---
title: "Shopify - Manual integration: Creating a Dynamic Product Flow"
url: "https://kb.getflowbox.com/en/article/shopify-manual-integration-creating-a-dynamic-product-flow"
language: "en"
last_updated: "2026-07-02T15:55:40.287Z"
---
# Shopify - Manual integration: Creating a Dynamic Product Flow
A guide to creating a Dynamic Product Flow manually in Shopify
Once you have [created a Flow in the Visual Marketing > Flows menu](https://kb.getflowbox.com/en/article/manage-your-flows) of the Flowbox dashboard, you can display the Flow on your Shopify page.
You can create 3 different types of Flows in Shopify:
- **Static Flow** – typically used on the home page and/or a community page.
- **Dynamic Tag Flow** – perfect for an Instashop or category pages.
- **Dynamic Product Flow** – create shoppable galleries on your product pages.
This guide will focus on the *Dynamic Product Flow.*
## Configuring a Dynamic Product Flow
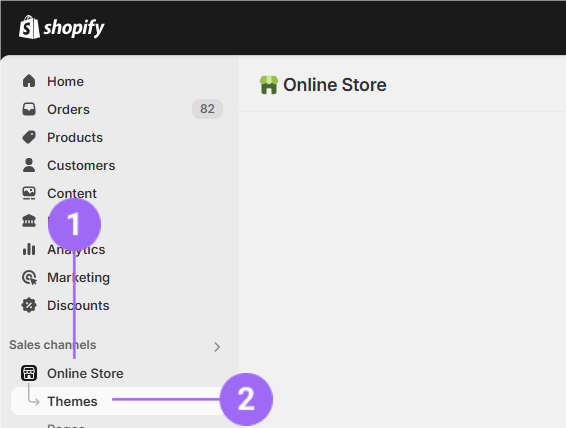
- First, log in to your Shopify account and go to 'Online Store' and click on 'Themes':
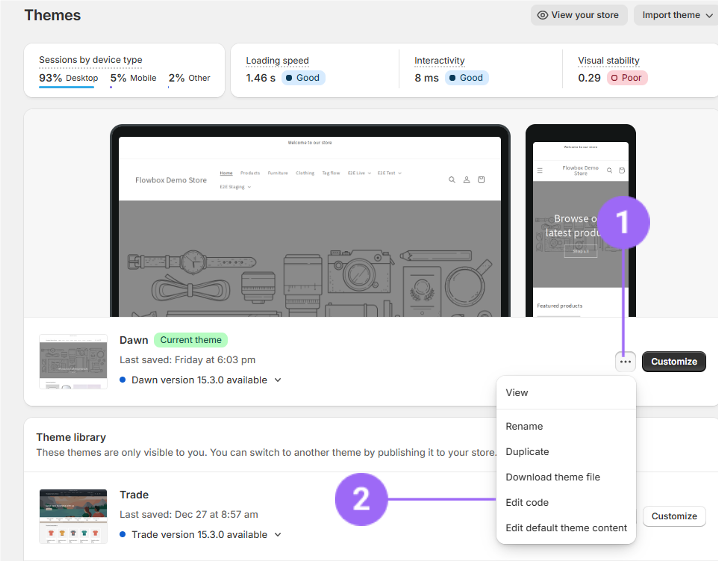
- Click on the 3 dots and 'Edit code':
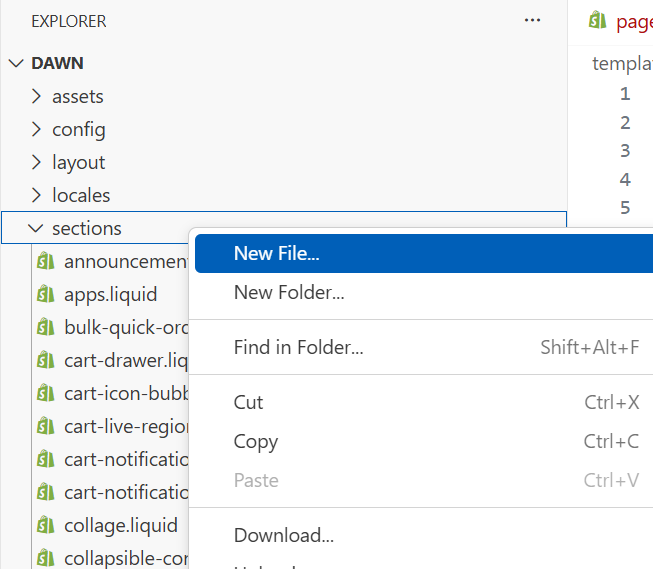
- Click on 'Sections'. Right-click, and then click on 'New file...':
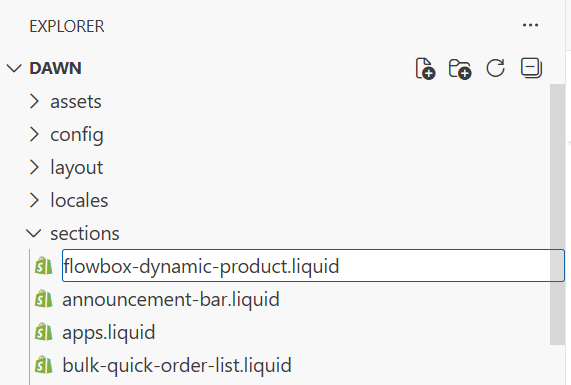
- Name your file **'flowbox-dynamic-product.liquid'** and press enter. A file will be created in your 'sections' directory:
- Copy paste the following code an click on 'Save' (top-right corner):
```
{% assign product_identifier = '' %}
{% if section.settings.product_identifier == 'sku' %}
{% assign product_identifier = product.selected_or_first_available_variant.sku %}
{% elsif section.settings.product_identifier == 'id' %}
{% assign product_identifier = product.id %}
{% endif %}
{% schema %}
{
"name": "flowboxDynamicProduct",
"class": "flowbox-section",
"settings": [
{
"type": "text",
"id": "flowKey",
"label": "Flow Key"
},
{
"type": "text",
"id": "flowLocale",
"label": "Locale",
"default": "en-EU"
},
{
"type": "select",
"id": "product_identifier",
"label": "Product Identifier",
"options": [
{ "value": "sku", "label": "Variant SKU" },
{ "value": "id", "label": "Product ID" }
],
"default": "sku"
}
],
"presets": [
{
"name": "Dynamic Product Flow",
"category": "Flowbox Widgets"
}
]
}
{% endschema %}
{% stylesheet %}
{% endstylesheet %}
```
> In this code example, we're using a flow named '**Dynamic Product Flow**'. If you want to change the name, make sure to update both "name" fields within the schema section of the code.
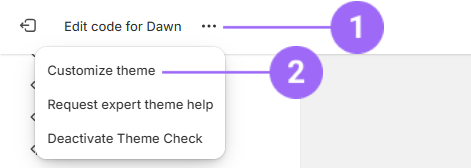
- Click on the 3 dots on top and on 'Customize theme:
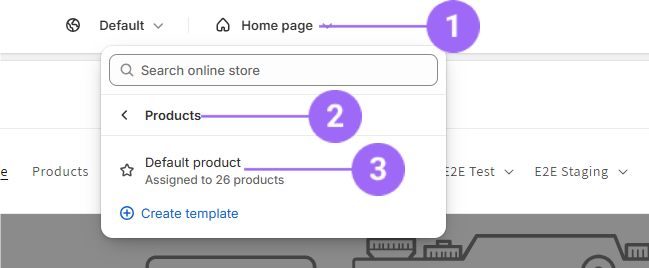
- You're currently on the Homepage. Switch to the Default Product page (or the page where you want to implement the flow):
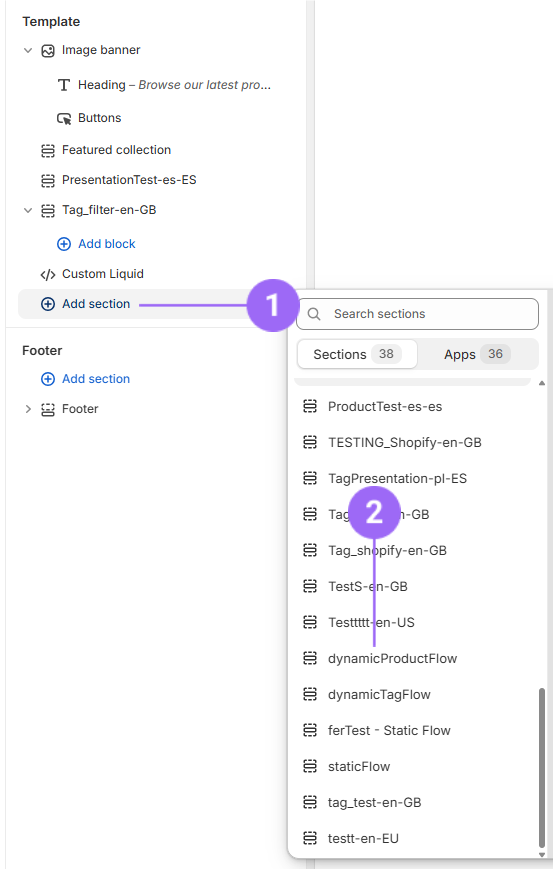
- To add the Flow to your page, click "Add section" and search your Flow by typing the name that was previously set up. Then, select it from the dropdown menu:
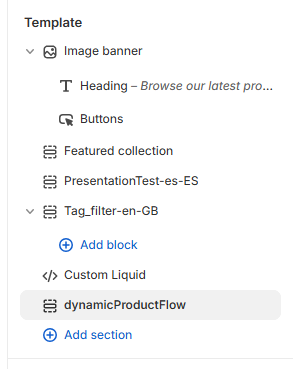
- Click on the newly added section:
- Add your flow-key, locale and choose which identifier method should be used to trigger the flow (Product ID or Variant SKU). This determines how products are matched between Shopify and Flowbox.
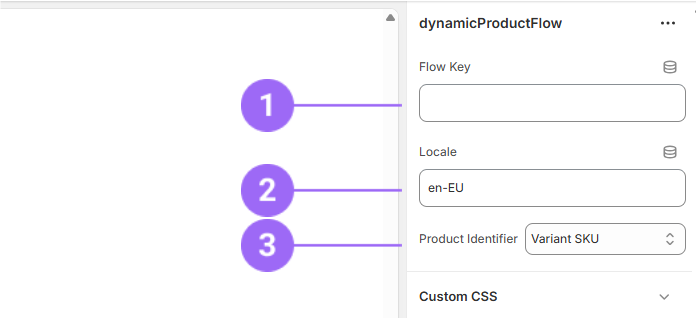
> Get the Flow Key by copying it from the **'Copy Flow Key'** option in the meatball (three-dot) menu in the Visual Marketing > Flows menu in the Flowbox dashboard:
> 
> You will see a default locale set to 'en-EU'. Please update this to match the locale used in [your Catalogs](https://kb.getflowbox.com/en/article/how-to-add-a-product-catalog-to-flowbox), as seen in [the "Catalogs"](https://app.getflowbox.com/commerce/catalogs) section from your Flowbox dashboard.
>
> The locale combines a language code and a region code, and serves two main purposes:
>
> 1\. Translate the widget's text and forms to the selected language.
> 2\. Specify the catalog from which we should fetch data for assigned products, such as the product titles, product links and the product price's currency.
>
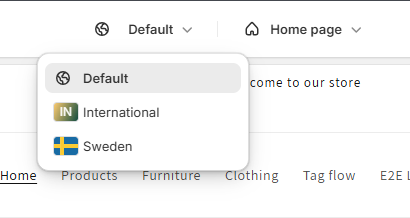
> If you wish to apply a different setup for a specific country, you can override the default settings as follows :
>
> 1\. Select the desired country:
> 
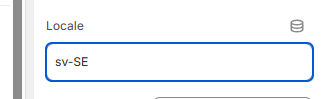
> 2\. Adjust the relevant settings (e.g., tags, locale, etc.):
> 
> 3\. Click **Save** to apply the changes .
- Drag the flow to where you want to position it on the page, and then click 'Save' to see a preview of your Flow.
## More Shopify manual guides
- [Creating a Static Flow](https://kb.getflowbox.com/en/article/shopify-manual-integration-creating-a-static-flow)
- [Creating a Dynamic Tag Flow](https://kb.getflowbox.com/en/article/shopify-manual-integration-creating-a-dynamic-tag-flow)