
Embedding and implementing Dynamic Tag Flows in Magento 2
Before you begin
Before we begin, make sure that you have a copy of your Flowbox 'Flow key'.
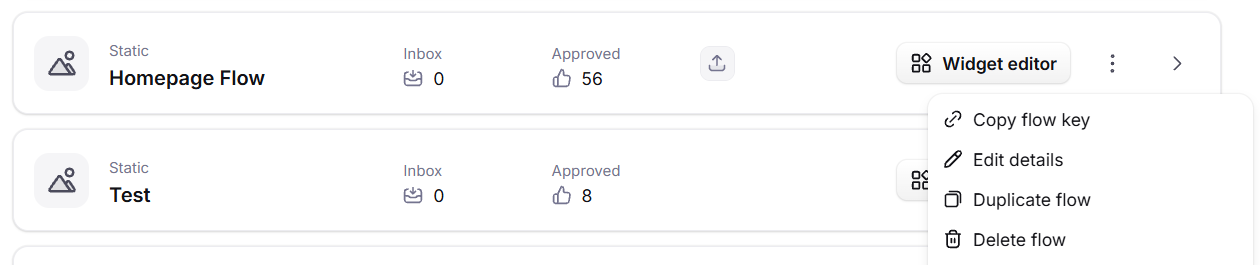
To find your 'Flow key', log into Flowbox and select your Flow, then click on the meatball (three-dot) menu to copy the key:
It is also a good idea to read through our general guide on Dynamic Tag Flows first.
Embedding the Flowbox JS library
The first step to embedding Flowbox widgets in Magento 2 is including the flowbox.js script in the HTML <head> section in order to call the function across your site. You only need to follow this procedure once, as this script is shared among all widgets.
Note: if you have already implemented a Static Flow on your Magento 2 site and carried out these steps, you can ignore this section.
In order to do this, follow these steps:
- Log into your Magento account. Note: make sure you have full permission levels to access the admin settings.
- Navigate to the Admin Panel, click on ‘Content’ and ‘Configuration’.
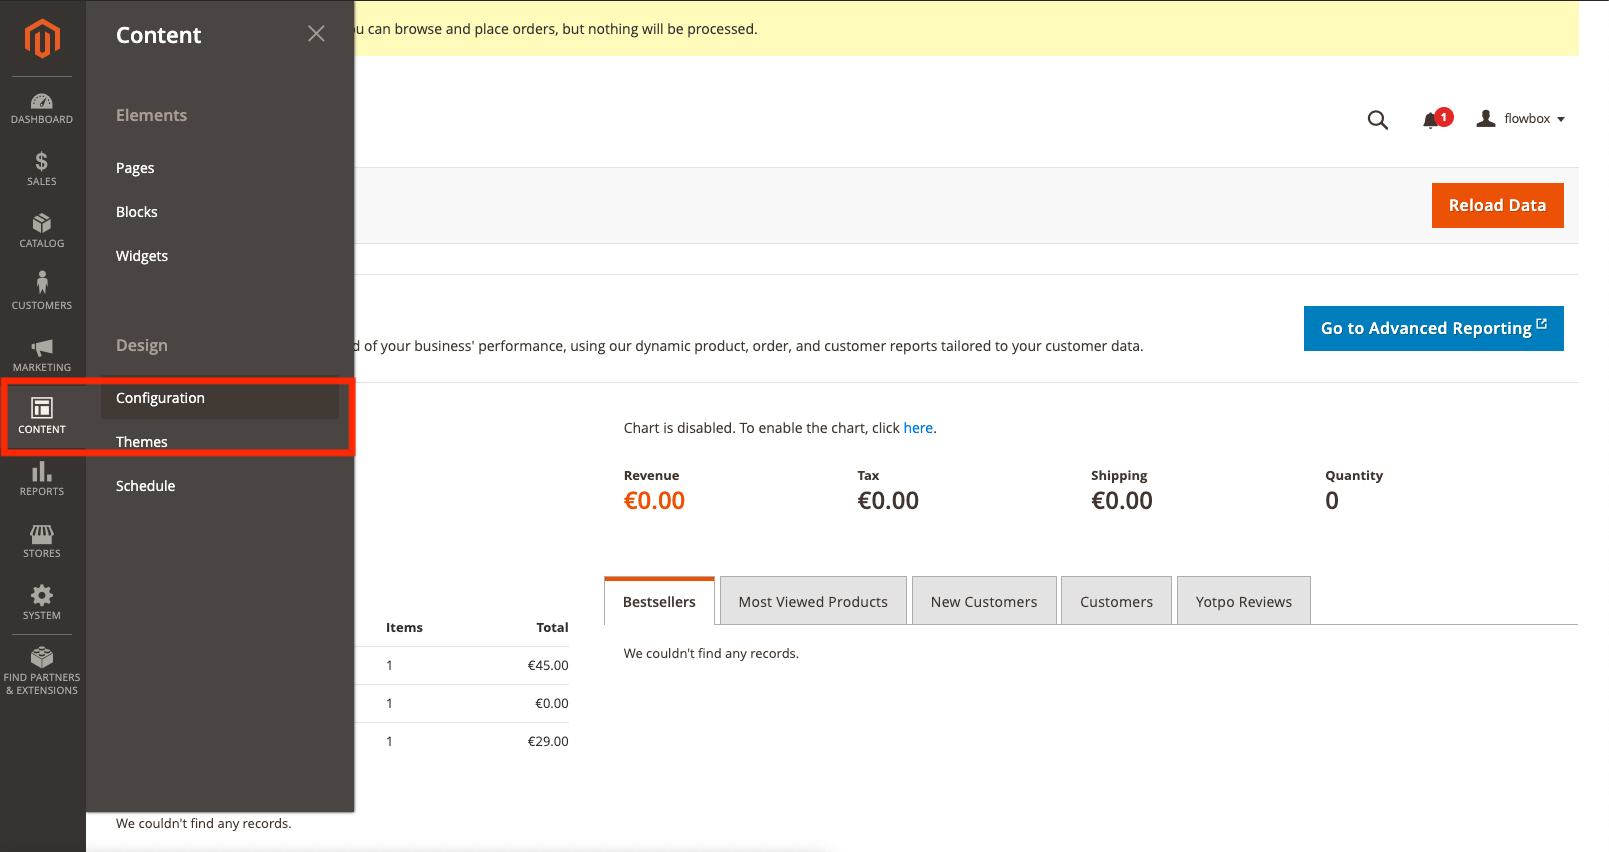
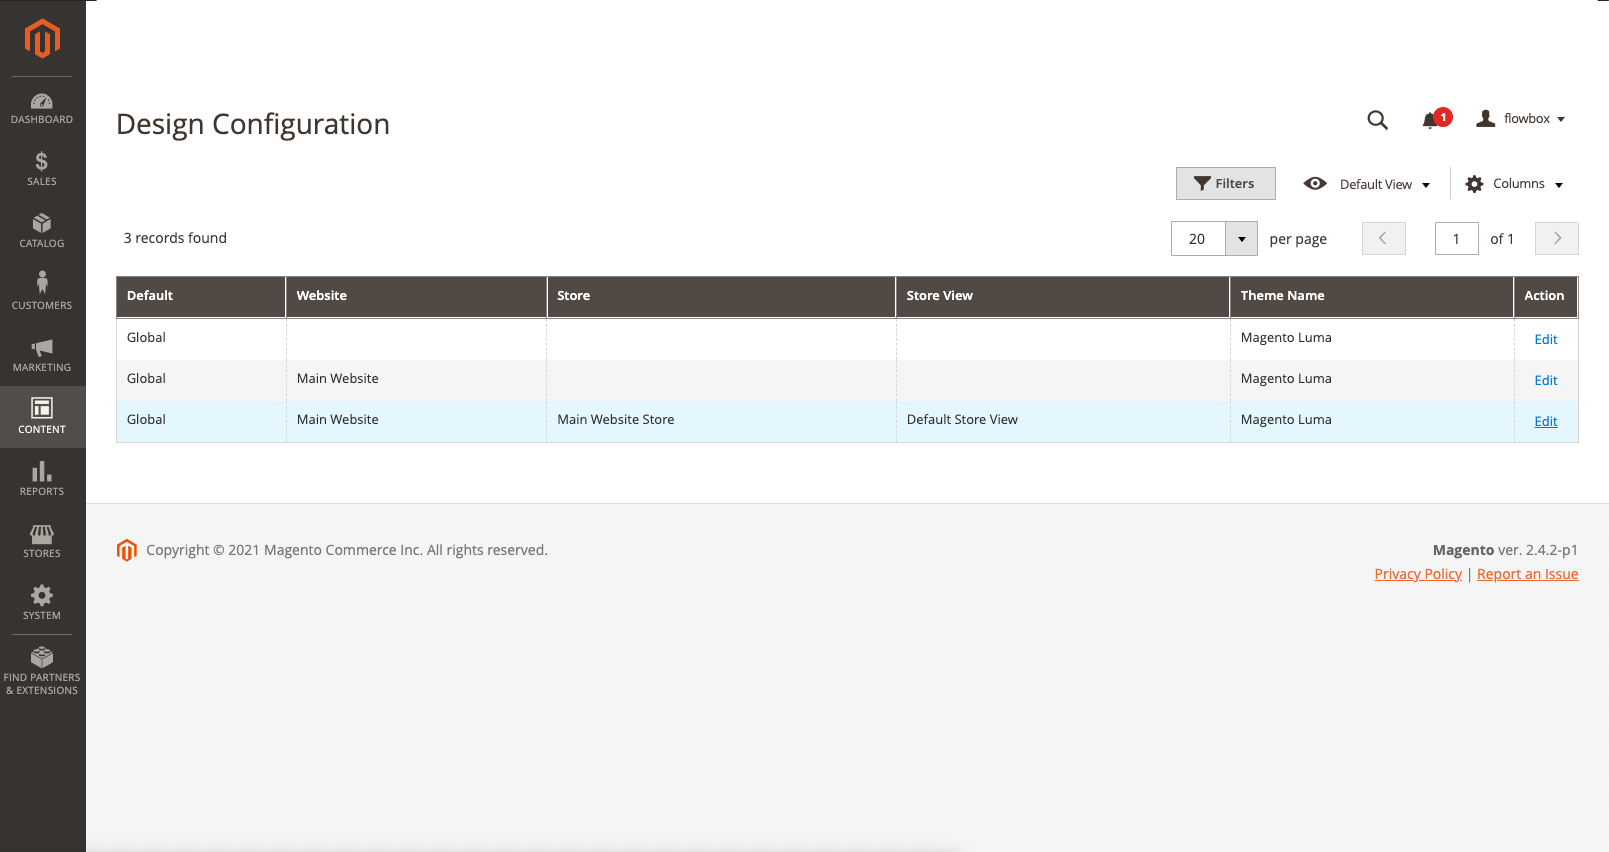
- Choose the store view that you want the head tag to be changed on or select Global in order to change it on every store view.
- Scroll down to the ‘HTML Head’ section.
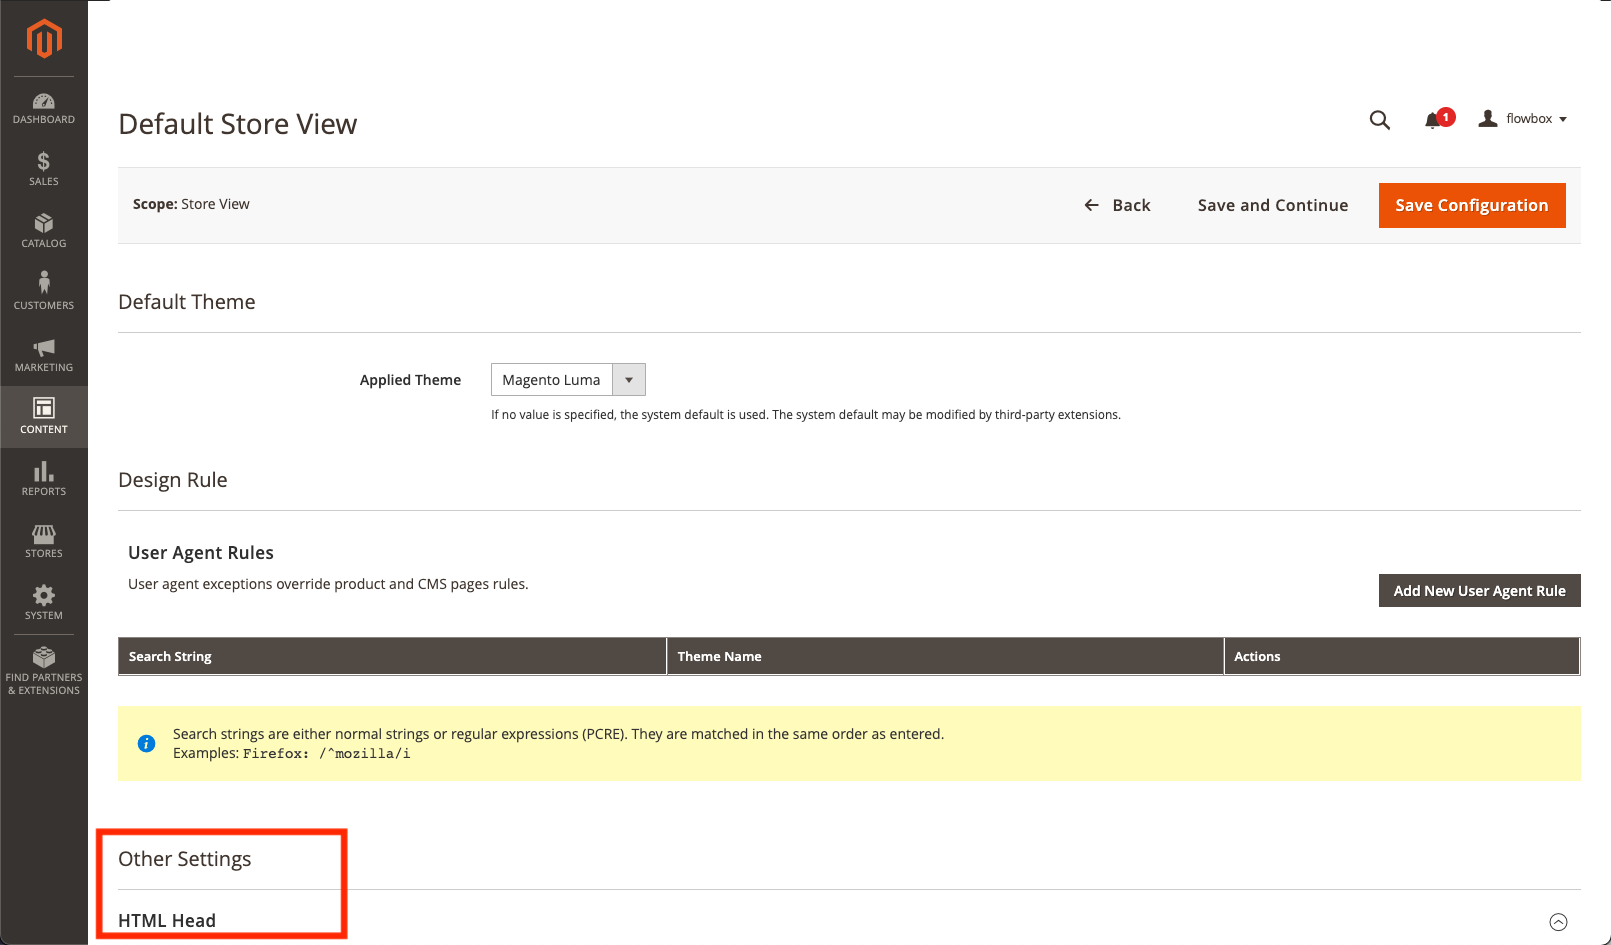
- In the Scripts and Style Sheets field, add this snippet:
<script>
  (function(d, id) {
    if (!window.flowbox) { var f = function () { f.q.push(arguments); }; f.q = []; window.flowbox = f; }
    if (d.getElementById(id)) {return;}
    var s = d.createElement('script'), fjs = d.scripts[d.scripts.length - 1]; s.id = id; s.async = true;
    s.src = ' https://connect.getflowbox.com/flowbox.js';
    fjs.parentNode.insertBefore(s, fjs);
  })(document, 'flowbox-js-embed');
</script>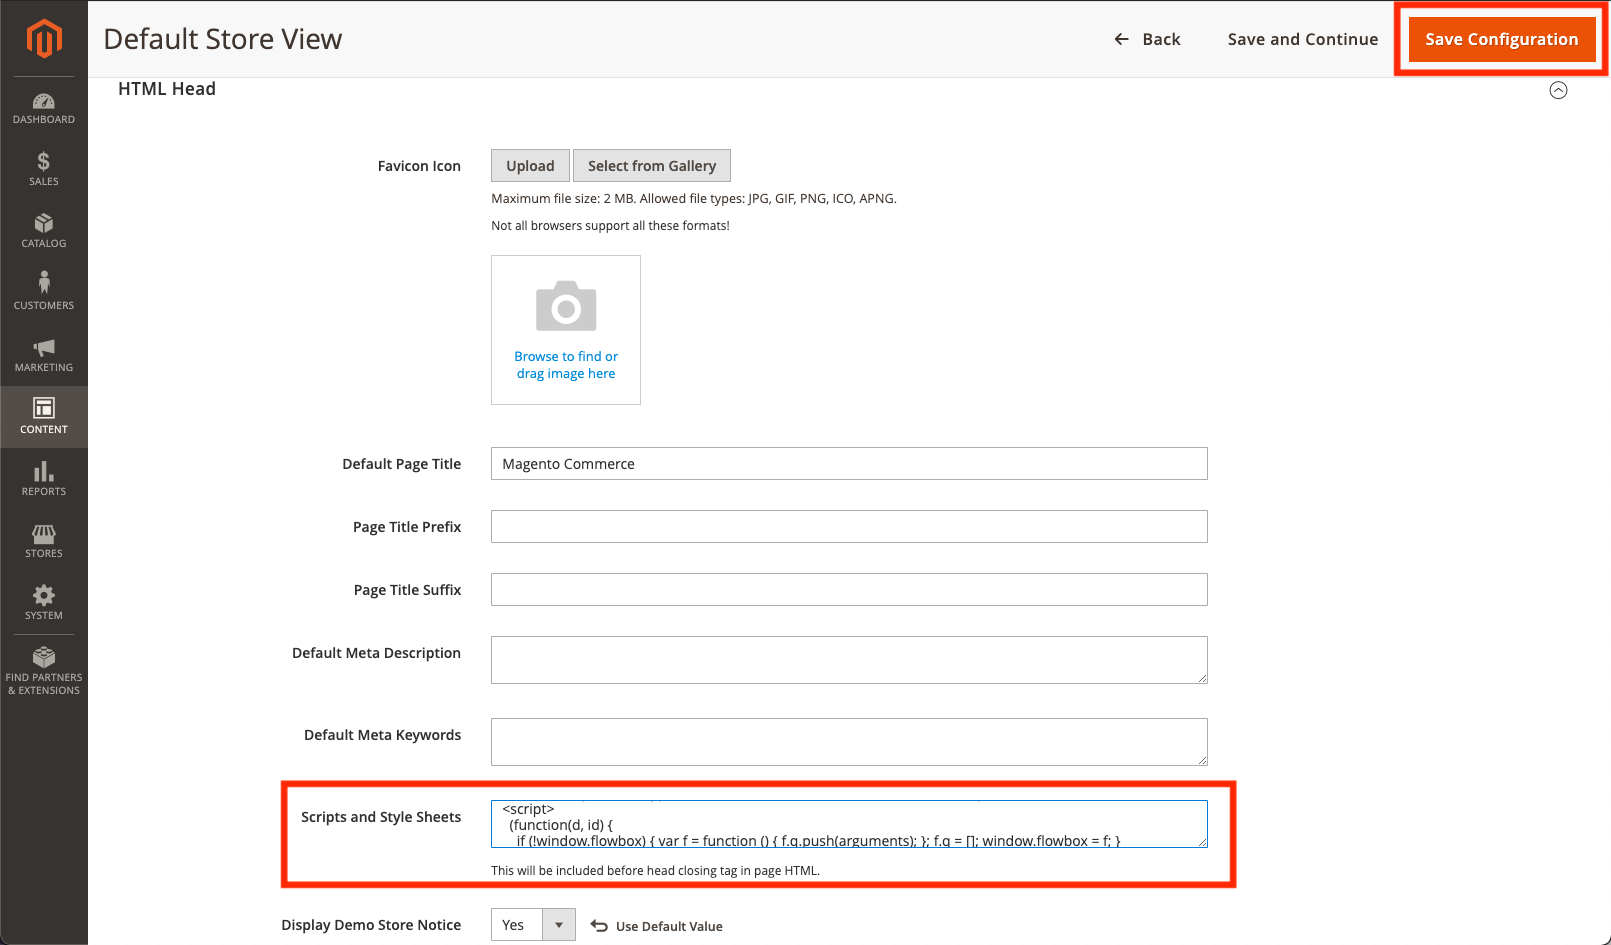
- Once you’ve added your script, click on the ‘Save Configuration’ button.
- It is always recommended to flush the cache in Magento after each update.
Flush the cache
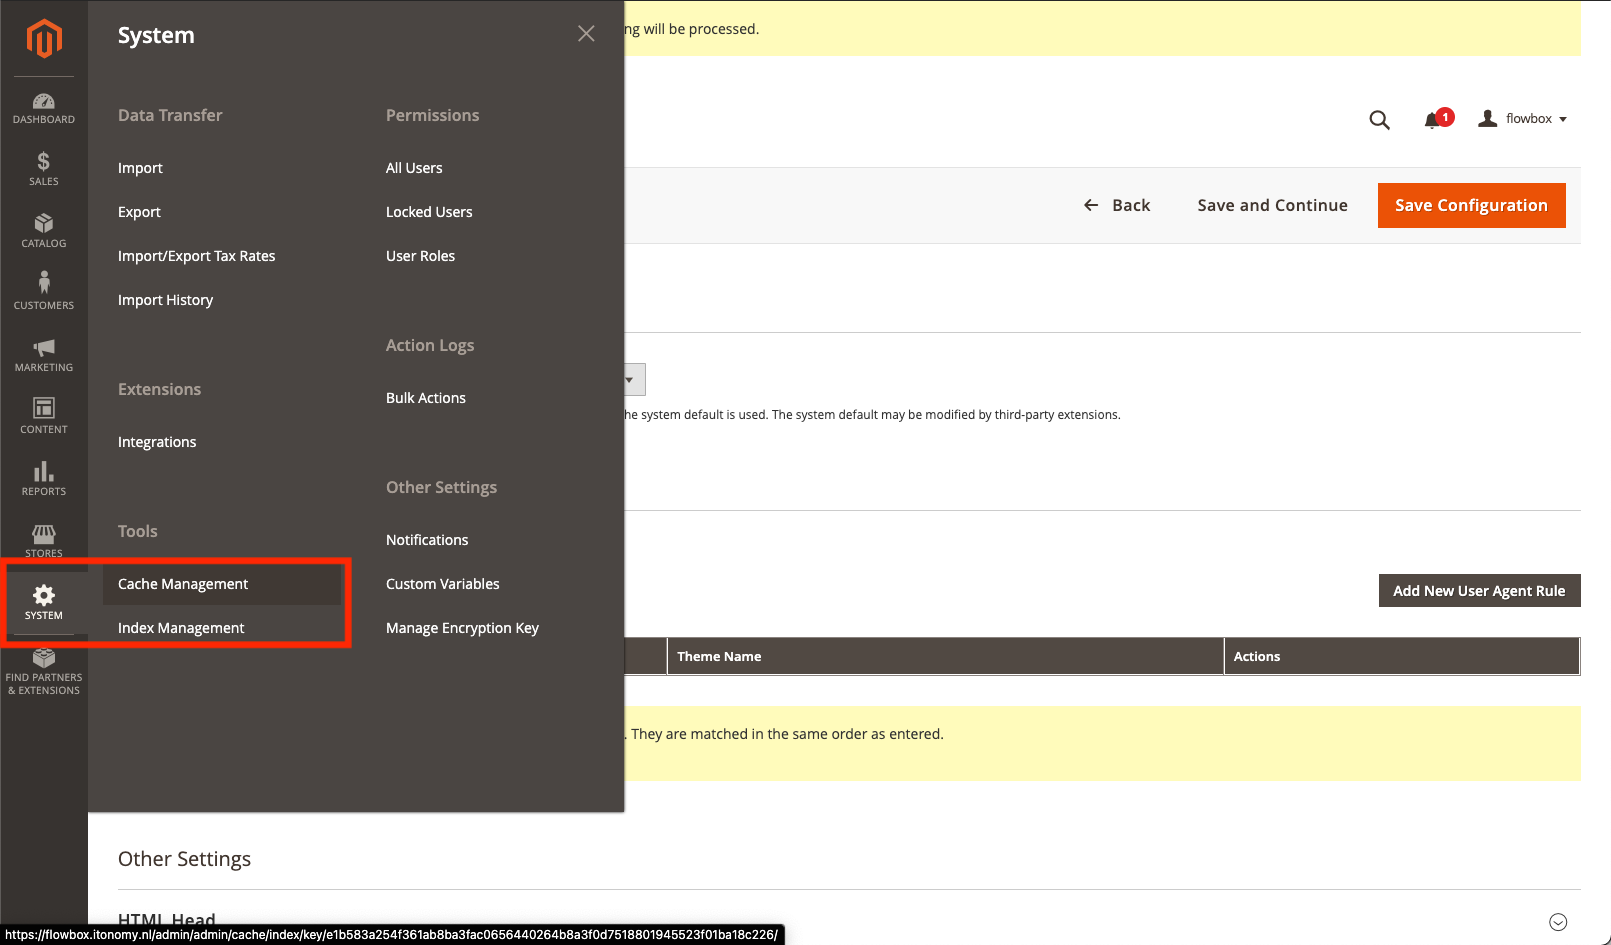
To flush the cache, go back to the Admin Panel, click on ‘System’, then ‘Cache Management’.
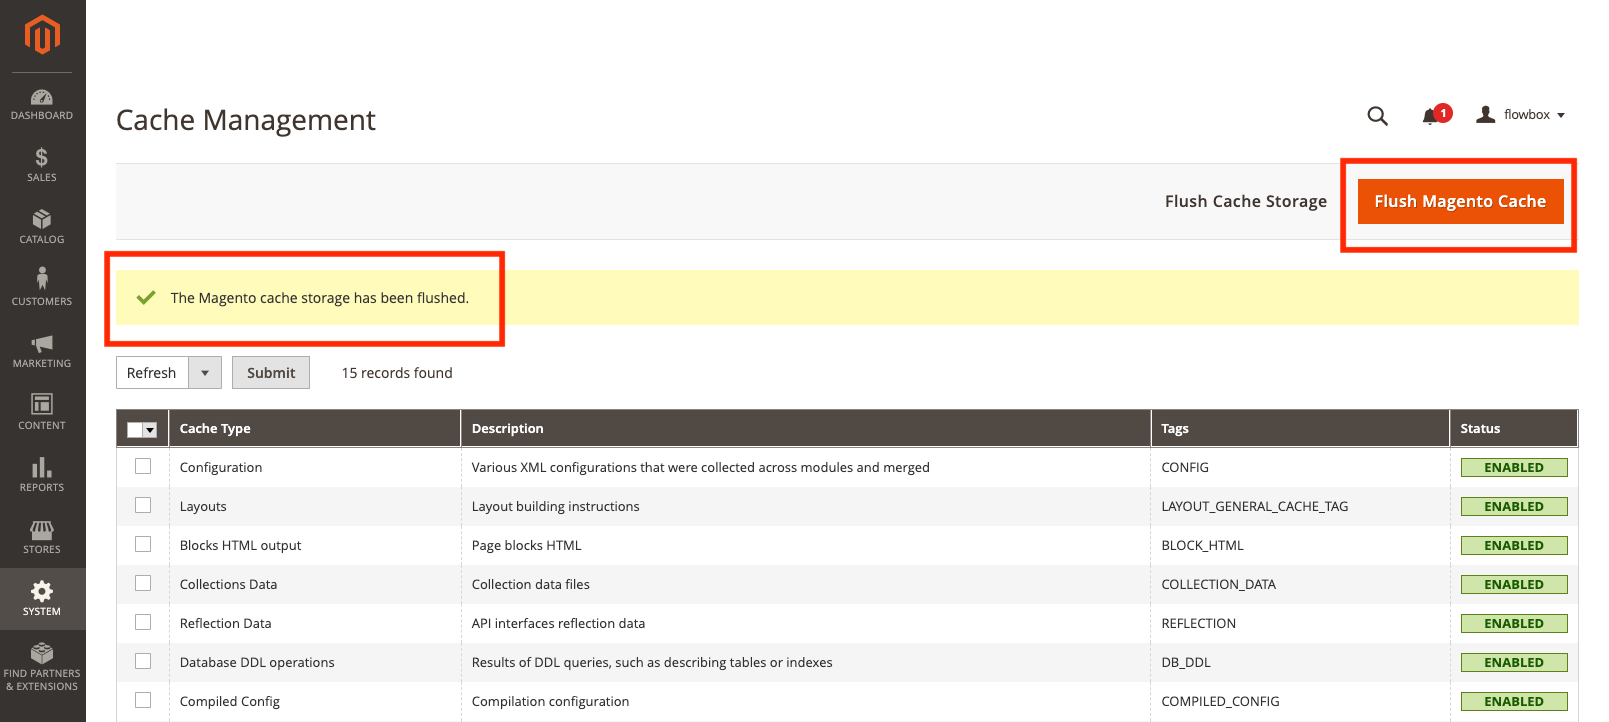
Click on the orange ‘Flush Magento Cache’ button. When completed, you will see a success message pop up on the screen.
Embed a Dynamic Tag Flow in a Page
Embedding a Dynamic Tag Flow on a page in Magento 2 is a great way to pull in and show off lots of content with different tags in one space.
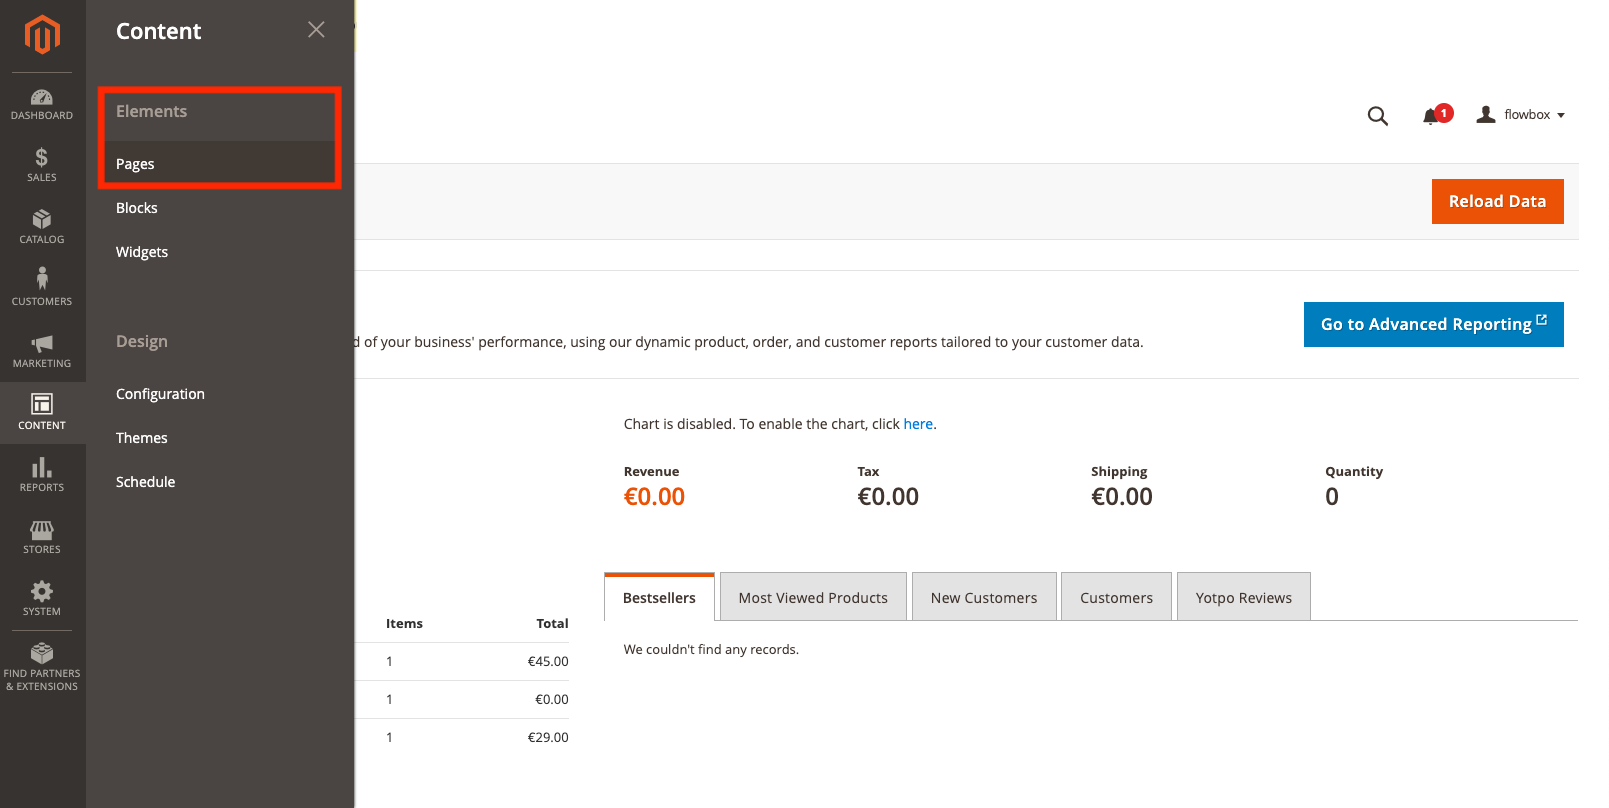
- Go to the Admin Panel and click on ‘Content’, then ‘Page’.
- Click on ‘Add New Page’.
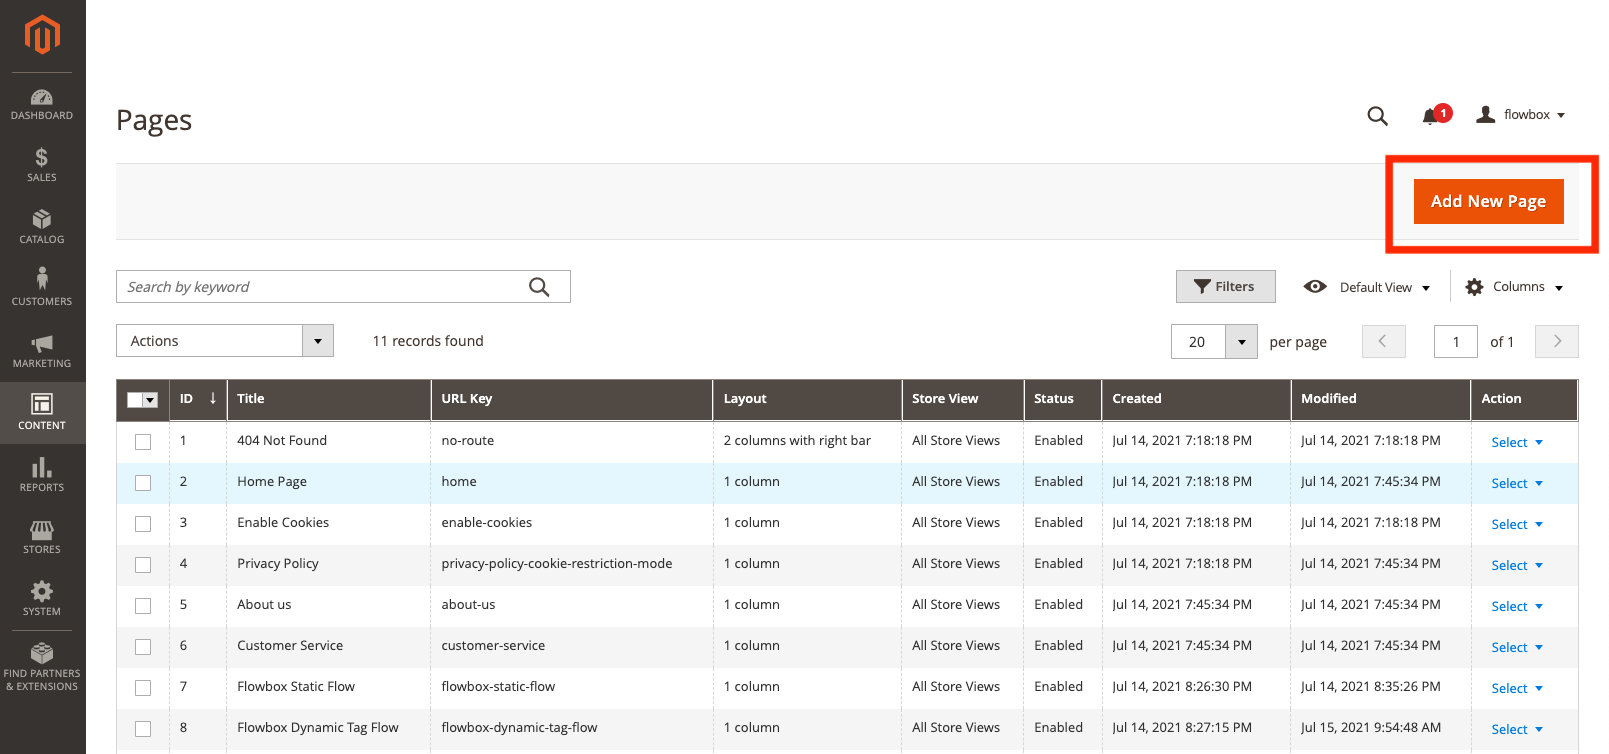
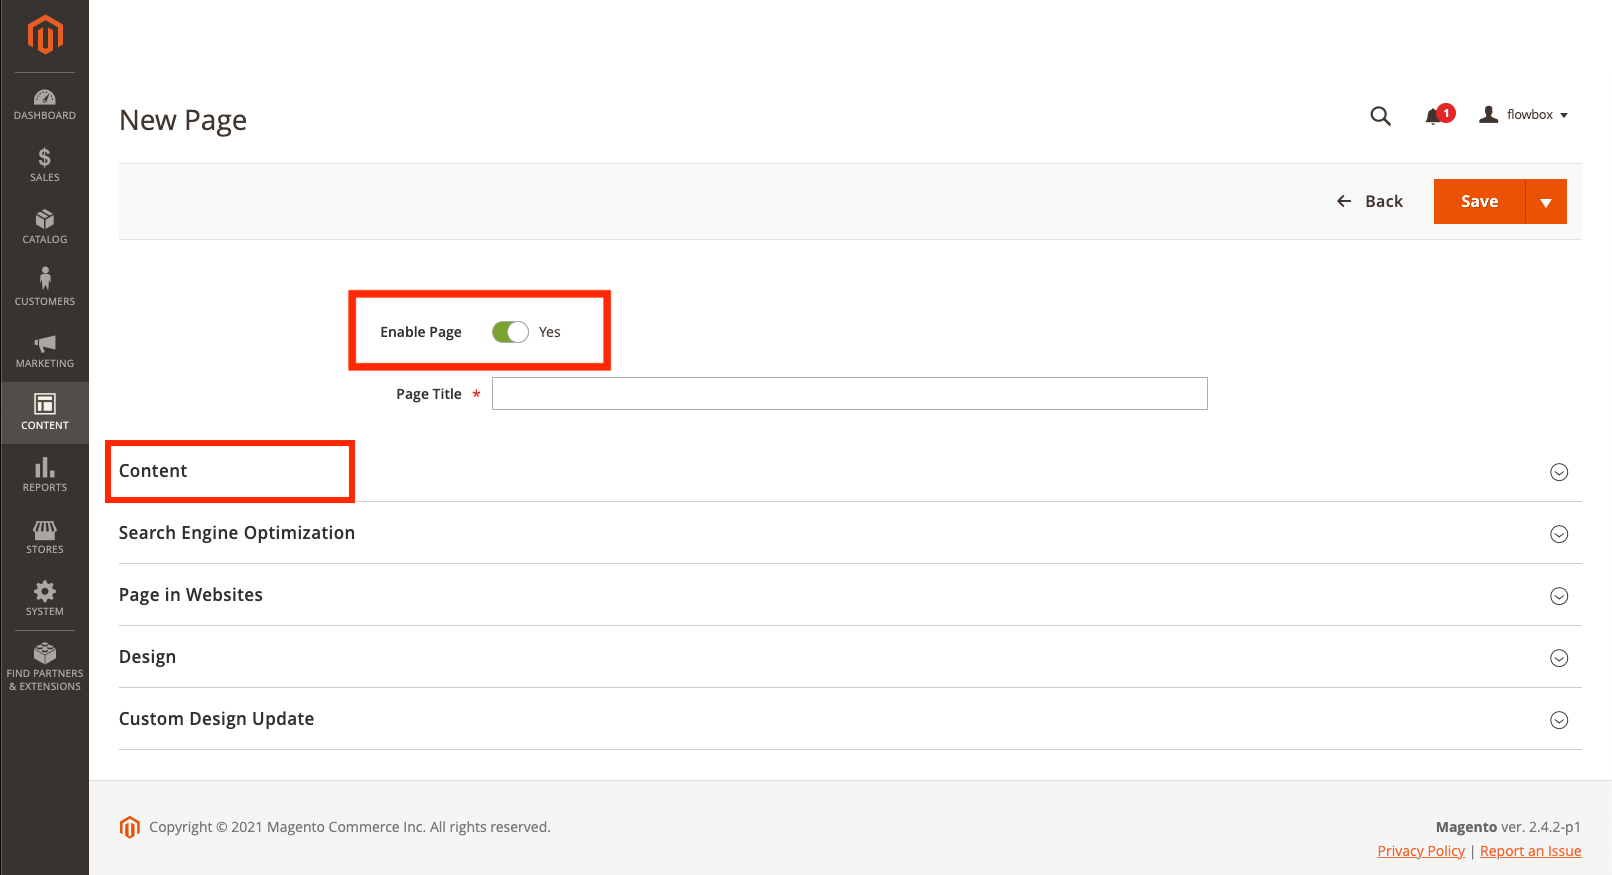
- Important step! Make sure you enable the page (green toggle), before clicking on ‘Content’ to edit the page.
- Once in Content view, click on ‘Show/Hide Editor’ to be able to embed the script.
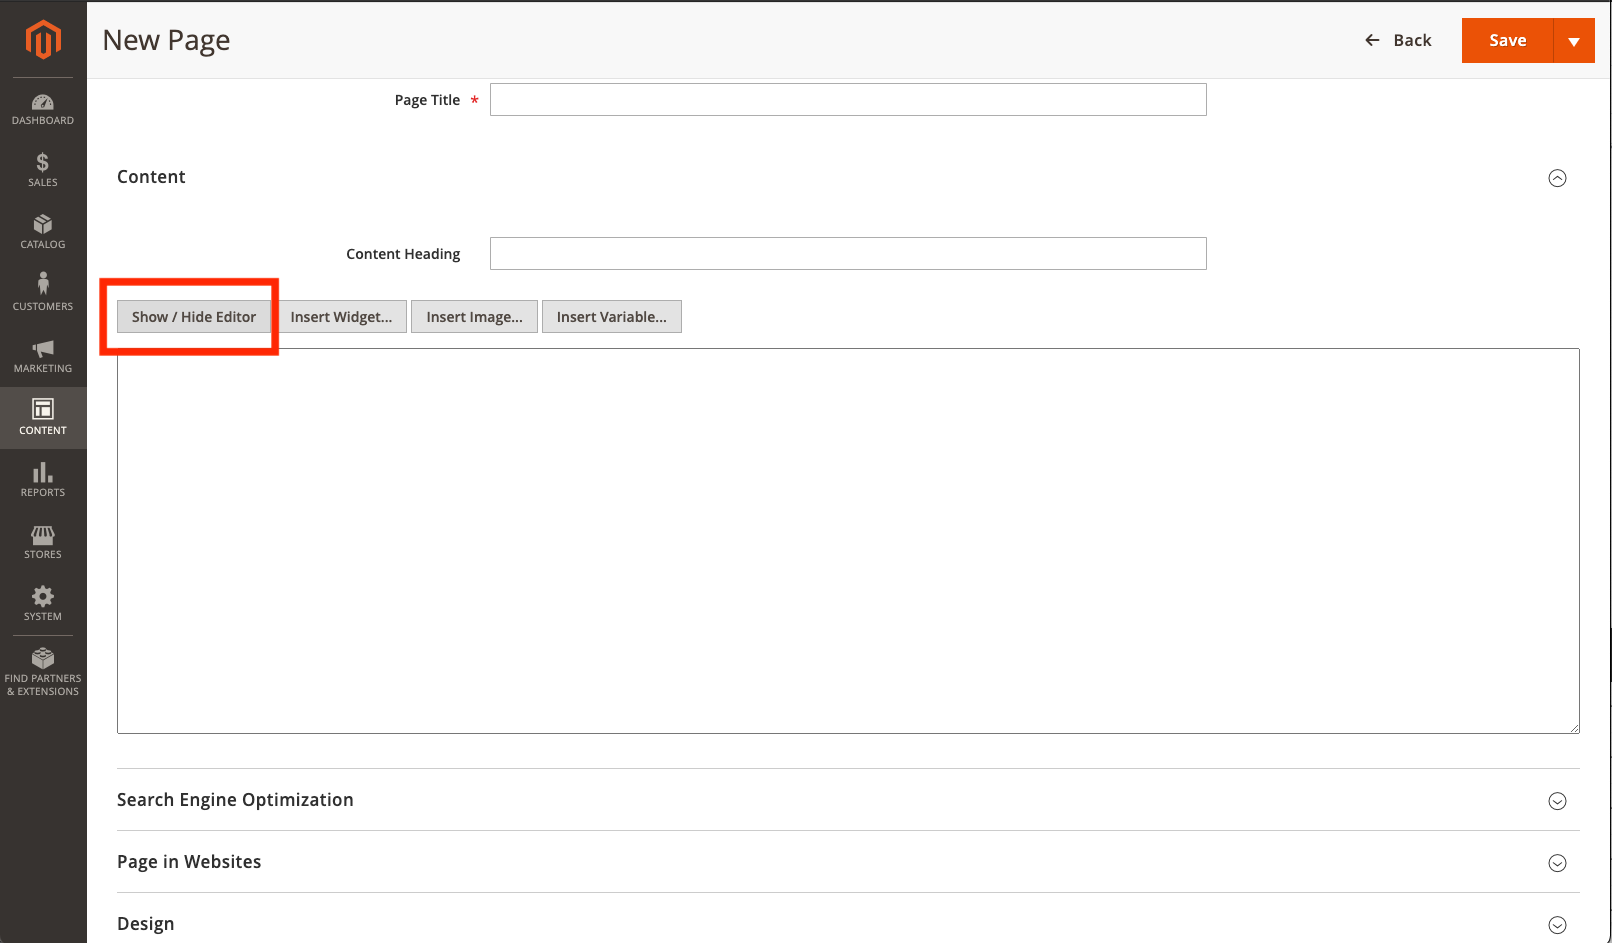
- Now you can paste your script into the main text box. Depending on what you want to integrate, you can use a script for a Dynamic Tag Flow or a script for a Dynamic Tag Flow with Filter buttons:
Dynamic Tag Flow
<div id="js-flowbox-flow"></div>
<script>
 window.flowbox('init', {
   container: '#js-flowbox-flow',
   key: 'Your-Flow-Key',
   locale: 'language-COUNTRY',
   tags: ['INSERT YOUR TAGS HERE']
 })
</script>
- The container property refers to an element on your page, in this case the div element with id
js-flowbox-flow. - The tags property is an Array of Tags available in your account. It can also be provided as a String. It filters the content by matching its values to the post's assigned Tags.
- The key property is the Flow key. The easiest way to find this is by copying it from the 'Copy Flow Key' option in the meatball (three-dot) menu in Flows section, as explained in "Before you begin".
- The locale property needs to be a combination of
languageandregioncodes: e.g.en-EU,en-GB,sv-SEores-ES. It serves two purposes. Firstly, it is used to translate the default texts within the Flow to the selected language. Secondly, it specifies the catalog from which the Flow should fetch data for assigned products, such as product titles, currency, and product links.
Dynamic Tag Flow with filter buttons
<div>
 <div class="tags" style="display: flex;
 justify-content: center;
 margin-bottom: 50px;
 cursor: pointer;">
 <button style="margin: 5px;" data-tag="">All</button>
 <button style="margin: 5px;" data-tag="football-shoes" class="active">Football Shoes</button>
 <button style="margin: 5px;" data-tag="workout-clothes">Workout Clothes</button>
 <button style="margin: 5px;" data-tag="football">Football</button>
</div>
<div id="js-flowbox-flow"></div>
</div>
<script>
 var allTags = new Array();
 for (i=1; i<document.querySelectorAll('button[data-tag]').length; i++){
   allTags.push(document.querySelectorAll('button[data-tag]')[i].dataset.tag);
 }

 window.flowbox('init', {
   container: '#js-flowbox-flow',
   key: 'YOUR FLOW KEY',
   locale: 'language-COUNTRY',
   tags: allTags,
   operator: "OR"
 })
</script>
<script>
function updateFlow (tag, tagsOperator) {
 window.flowbox('update', {
   key: 'YOUR FLOW KEY',
   tags: [tag],
   operator: tagsOperator
 });
}

const buttons = document.querySelectorAll('button[data-tag]');

function clearButtonClasses () {
 for (const button of buttons) {
   button.classList.remove('active');
 }
}

document.addEventListener('click', function (event) {
if (event.target.matches('div.tags button')) {
if (event.target.dataset.tag == "") {
updateFlow(allTags, "OR");
} else {
updateFlow(event.target.dataset.tag, "AND");
}
clearButtonClasses();
event.target.classList.add('active');
}
}, false);

</script>
- The buttons refer to the tag buttons at the top of the Flow. A tag button is created in this way:
<button style="margin: 5px;" data-tag="TAG" class="active">NAME OF BUTTON</button>. Note: the tag name in the script must match the tag in Flowbox. If you wish to create an ‘All’ button, then leave the TAG field empty, like this:<button style="margin: 5px;" data-tag="" class="active">ALL</button>. - The container property refers to an element on your page, in this case the div element with id
js-flowbox-flow. - The key property is the Flow key. The easiest way to find this is by copying it from the 'Copy Flow Key' option in the meatball (three-dot) menu in Flows section, as explained in "Before you begin".
- The locale property needs to be a combination of
languageandregioncodes: e.g.en-EU,en-GB,sv-SEores-ES. It serves two purposes. Firstly, it is used to translate the default texts within the Flow to the selected language. Secondly, it specifies the catalog from which the Flow should fetch data for assigned products, such as product titles, currency, and product links.
Once you’ve pasted the code, updated your buttons with your text and tags, and inserted your Flow key, click on the orange ‘Save’ button.
Note: Magento recommends flushing the cache after each update.
All updates and edits to your Flowbox Flow (content, styling, tags) need to be made in your Flowbox Admin account.