
Rights Request by Direct Message (DM)
We highly recommend asking for permission before using your users' content by sending Rights Requests. Don't worry, Flowbox makes this easy by letting you send the request through a comment or DM. Please note that the Rights Requests feature is only available for posts collected from Instagram and Tiktok.
Discover the step-by-step guide for Rights Requests by Comment in this article.
Create a template
First, you need to create a ‘Rights Request by DM’ template. If you have done it already, you can skip to the next section.
To prevent Instagram from blocking you, we recommend using different messages in your templates.
- In Flowbox, click on the 'Engage' menu, then select 'My Templates'.
- Click on 'Create Template'.
- Select the template type 'Rights Request by DM (manual)' and give your template a name, then click on 'Next'.
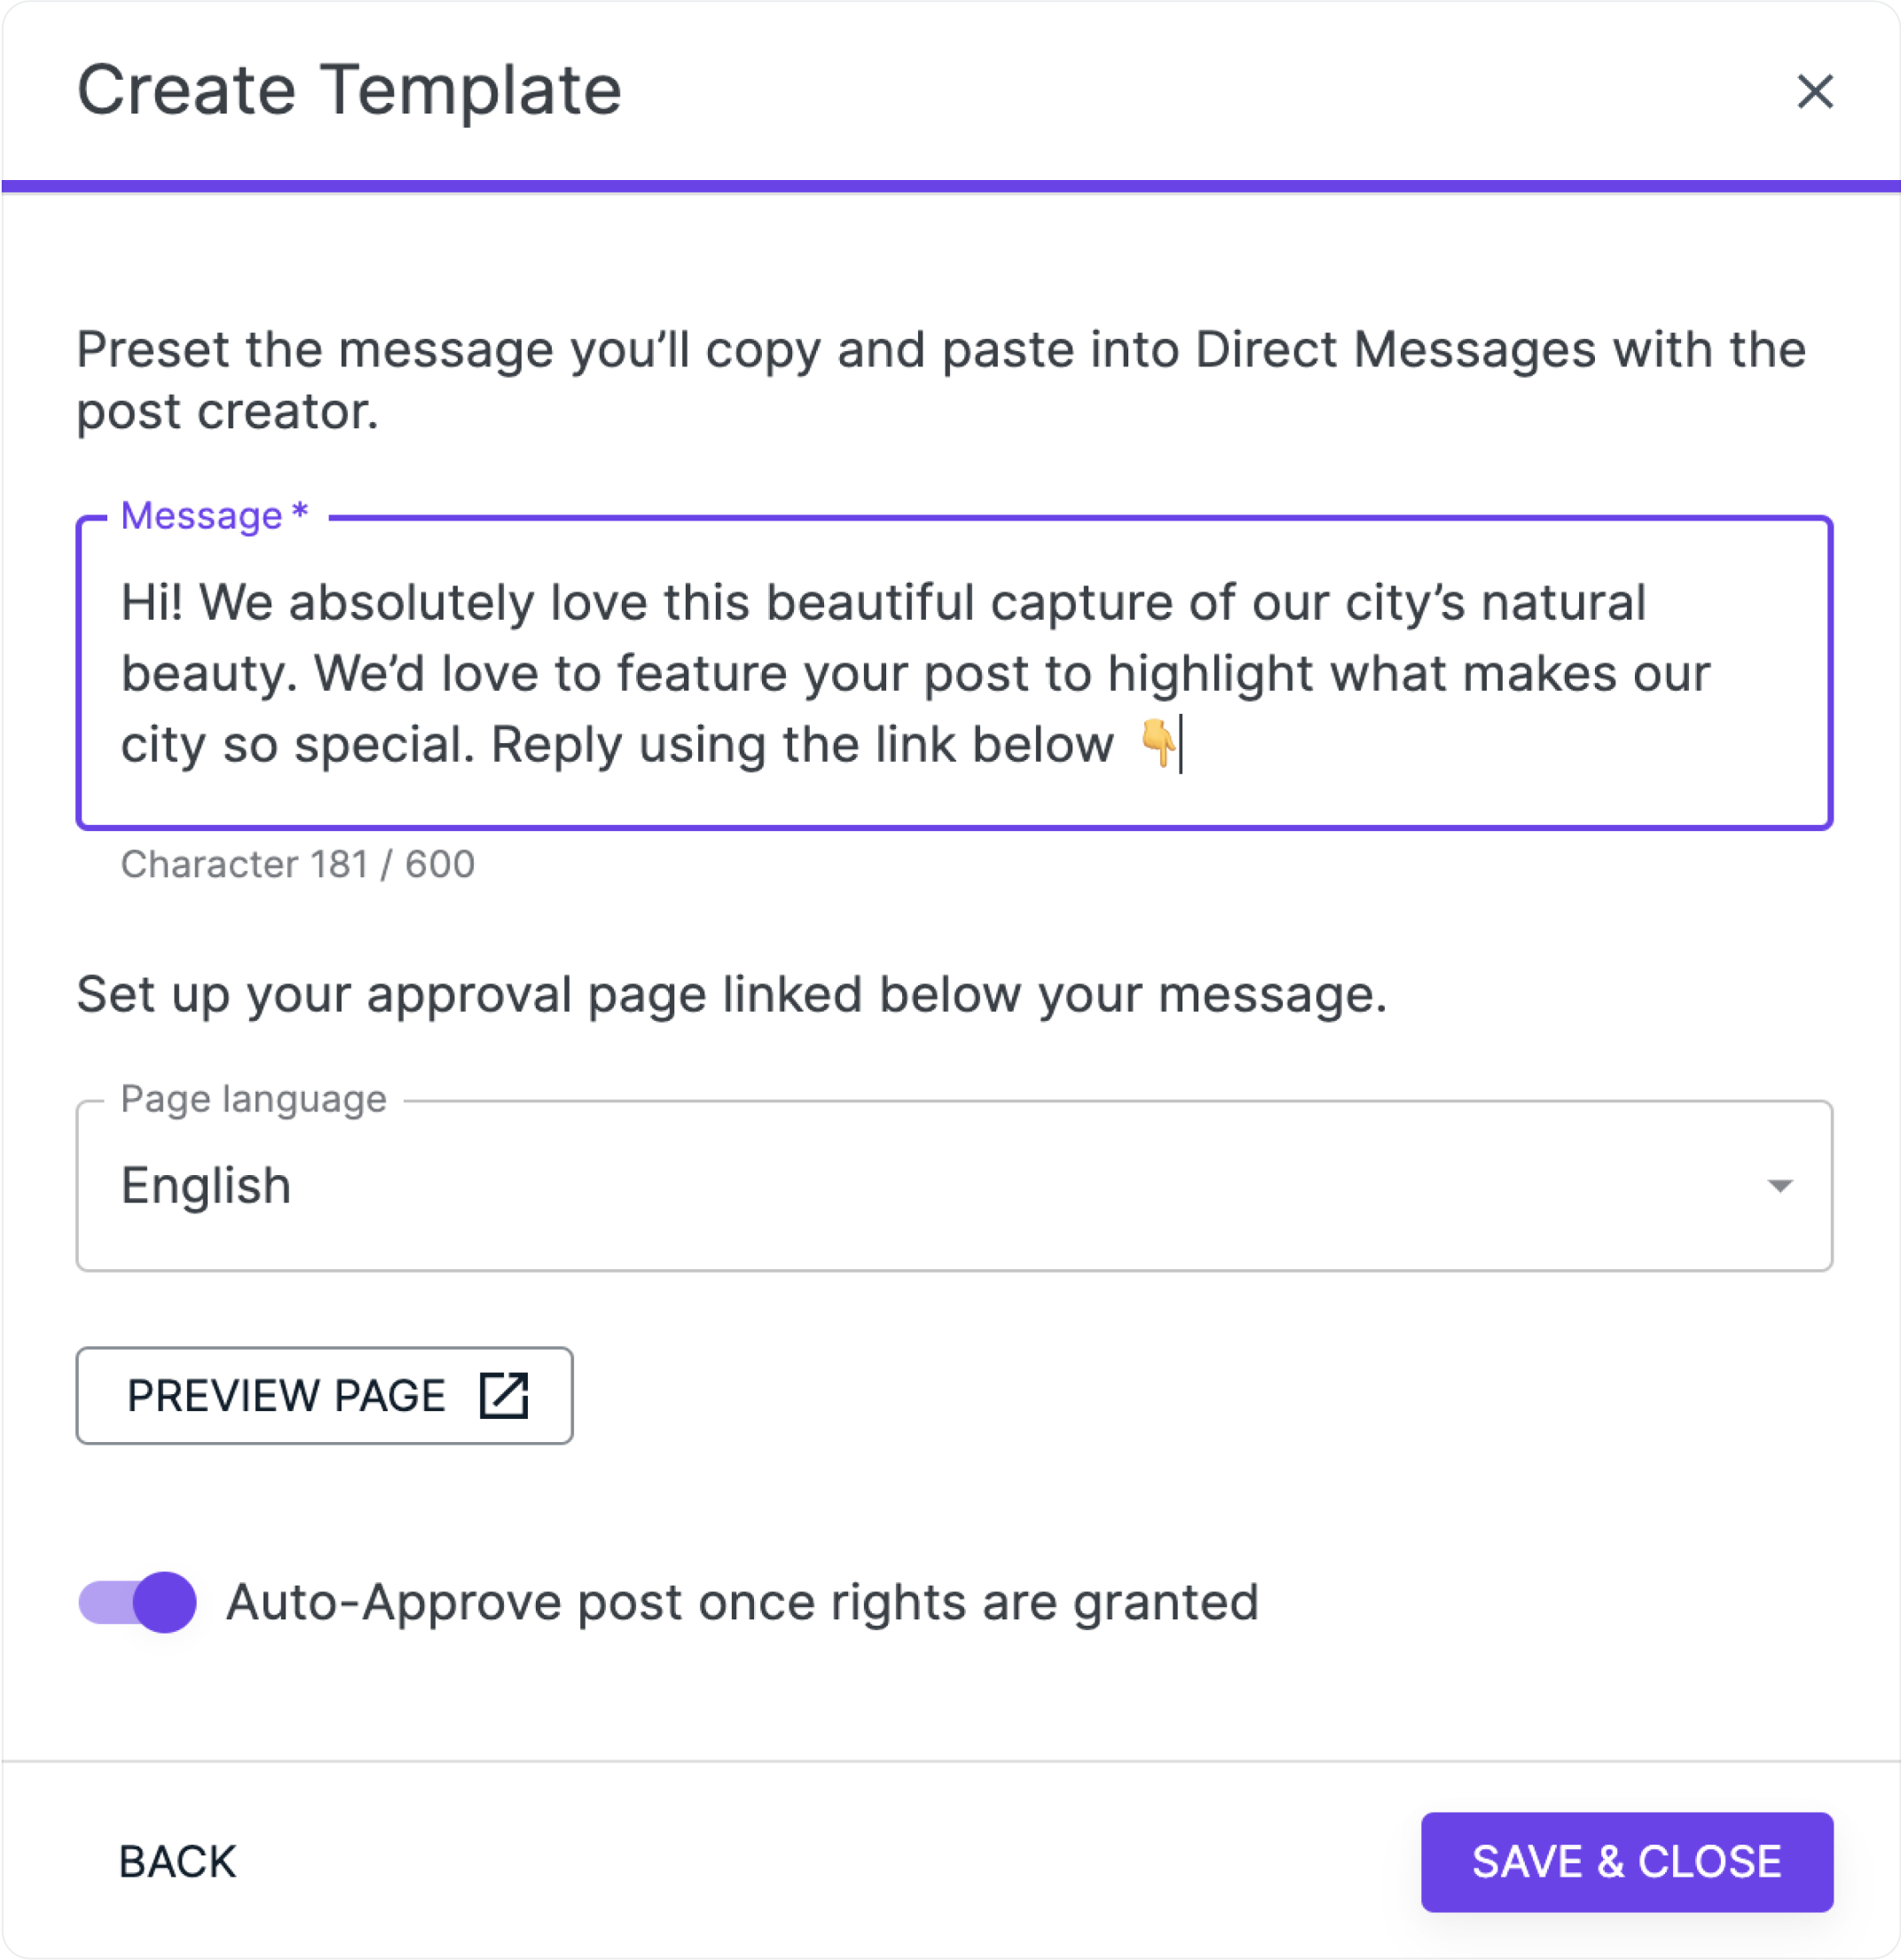
- Specify your message/comment: the message is what you will send directly to the creators of the posts you’d like to request (e.g., “Hello! We love your photo! Could we use it in our marketing? Please reply using the link below.”).
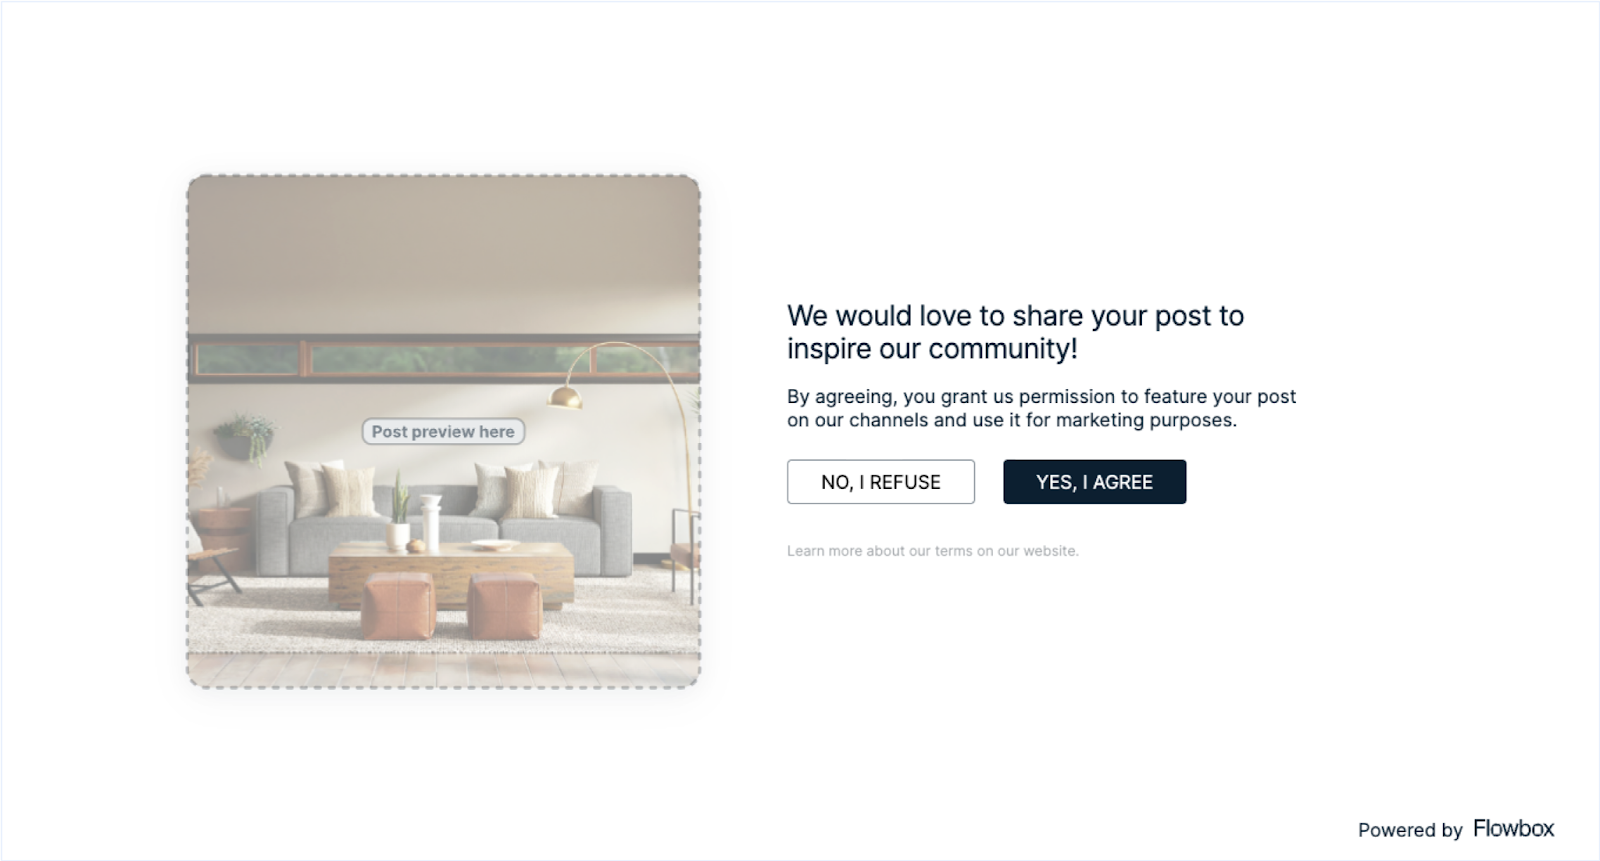
- Approval page language: in addition to your message, a link will be included in your direct message. This link allows each creator to approve or reject the request. To preview the approval page in different languages:
- Select the desired language.
- Click on ‘Preview page’. The “post preview” image will display the post you are requesting rights for.
- Optional: To automatically approve the post once the Rights Request has been granted, you can toggle ‘on’ the switch 'Auto-Approve'.
- When done, click 'Save & Close'.
We recommend matching the approval page language with your message language. For example, if your message is in French, select ‘French’ for the page language.
Send your Rights Requests
The next step is to send the Rights Request
Please note that on TikTok, you can only send direct messages (DMs) to friends. Before sending a rights request via DM, make sure you follow the content creator and that they follow you back.
We recommend matching the approval page language with your message language. For example, if your message is in French, select ‘French’ for the page language.
- In Flowbox, click on the ‘Visual Marketing’ menu.
- Click on ‘Flow’, go to your Masterflow or the specific Flow where the content you wish to request rights for has been collected.
- Click on the desired post.
- Click on the ‘hammer’ icon in the top-right corner.
- Select the ‘Manual DM’ method.
- Select your template
(6a.)and personalise it with the post context(6b.).
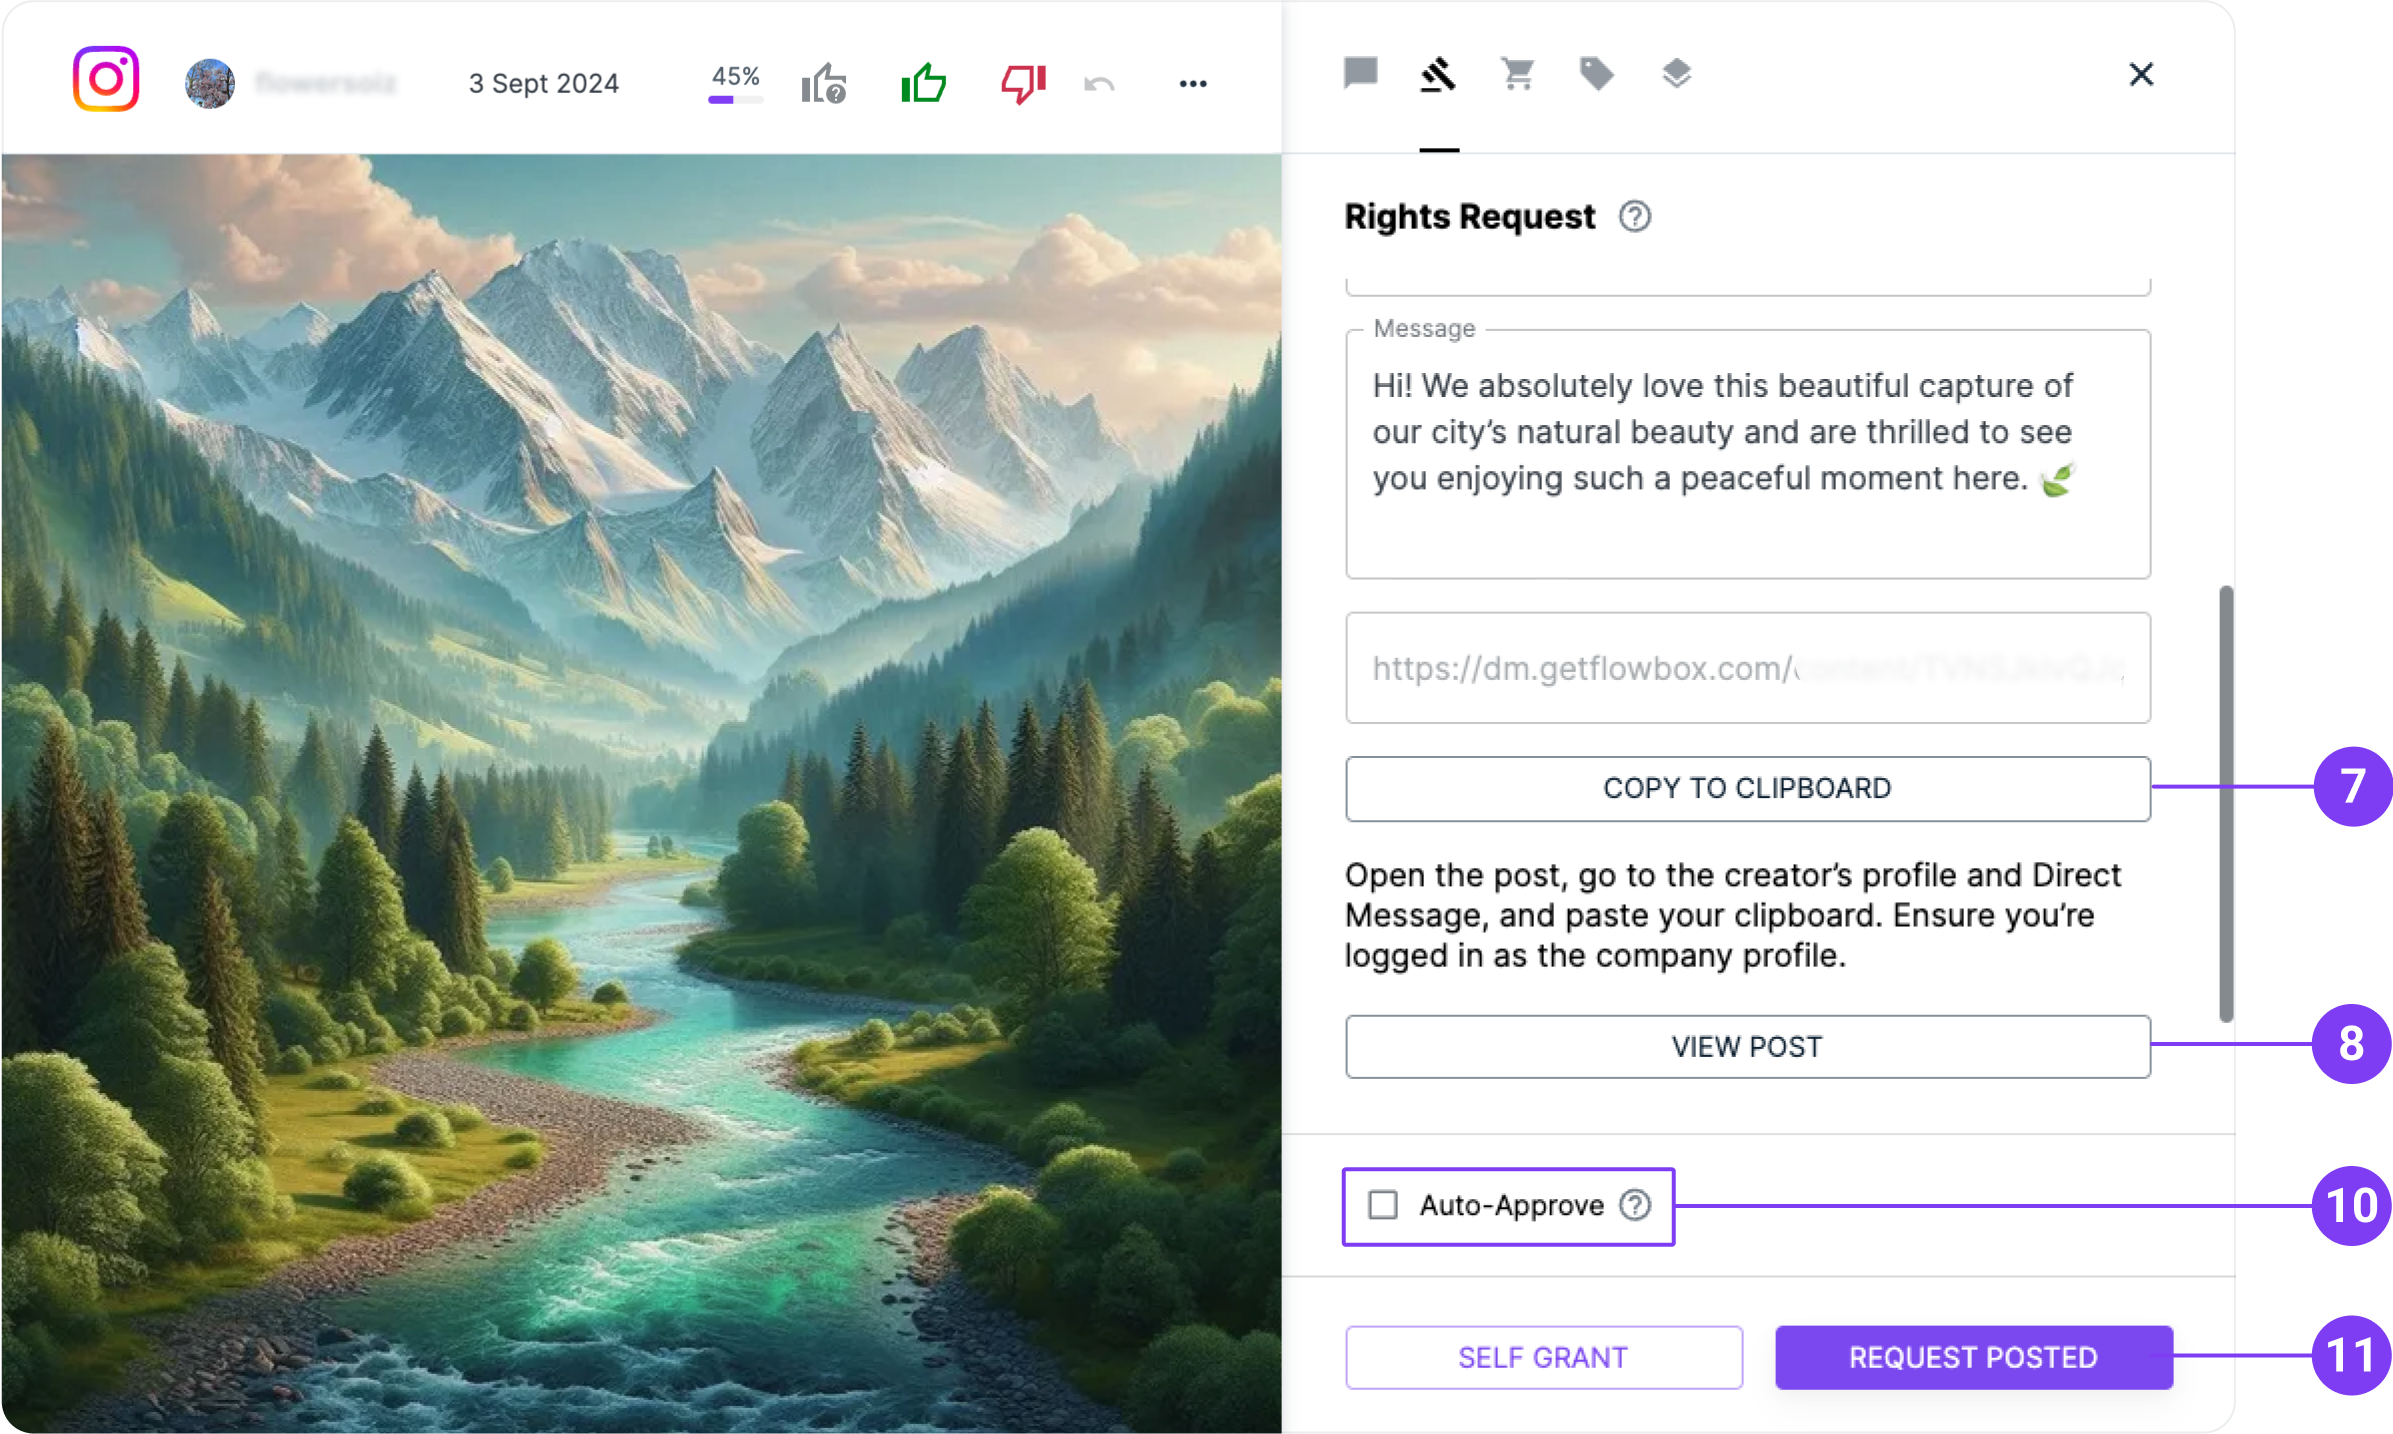
- Scroll and click on ‘Copy to clipboard’ to copy the message and the unique link.
- Click on 'View Post' to view the original post on Instagram, go to the creator’s profile, and click on ‘Message’.
- You can now paste your Rights Request as a DM and send it.
- Optional: Back in Flowbox,check the 'Auto-Approve' tick-box if you want the post to be automatically approved when the user approves the request.
- Click on 'Request Posted'.
Please note that each link is associated with a specific post and is unique to it. You must click on ‘Copy to clipboard’ for each post you wish to request via Direct Message.
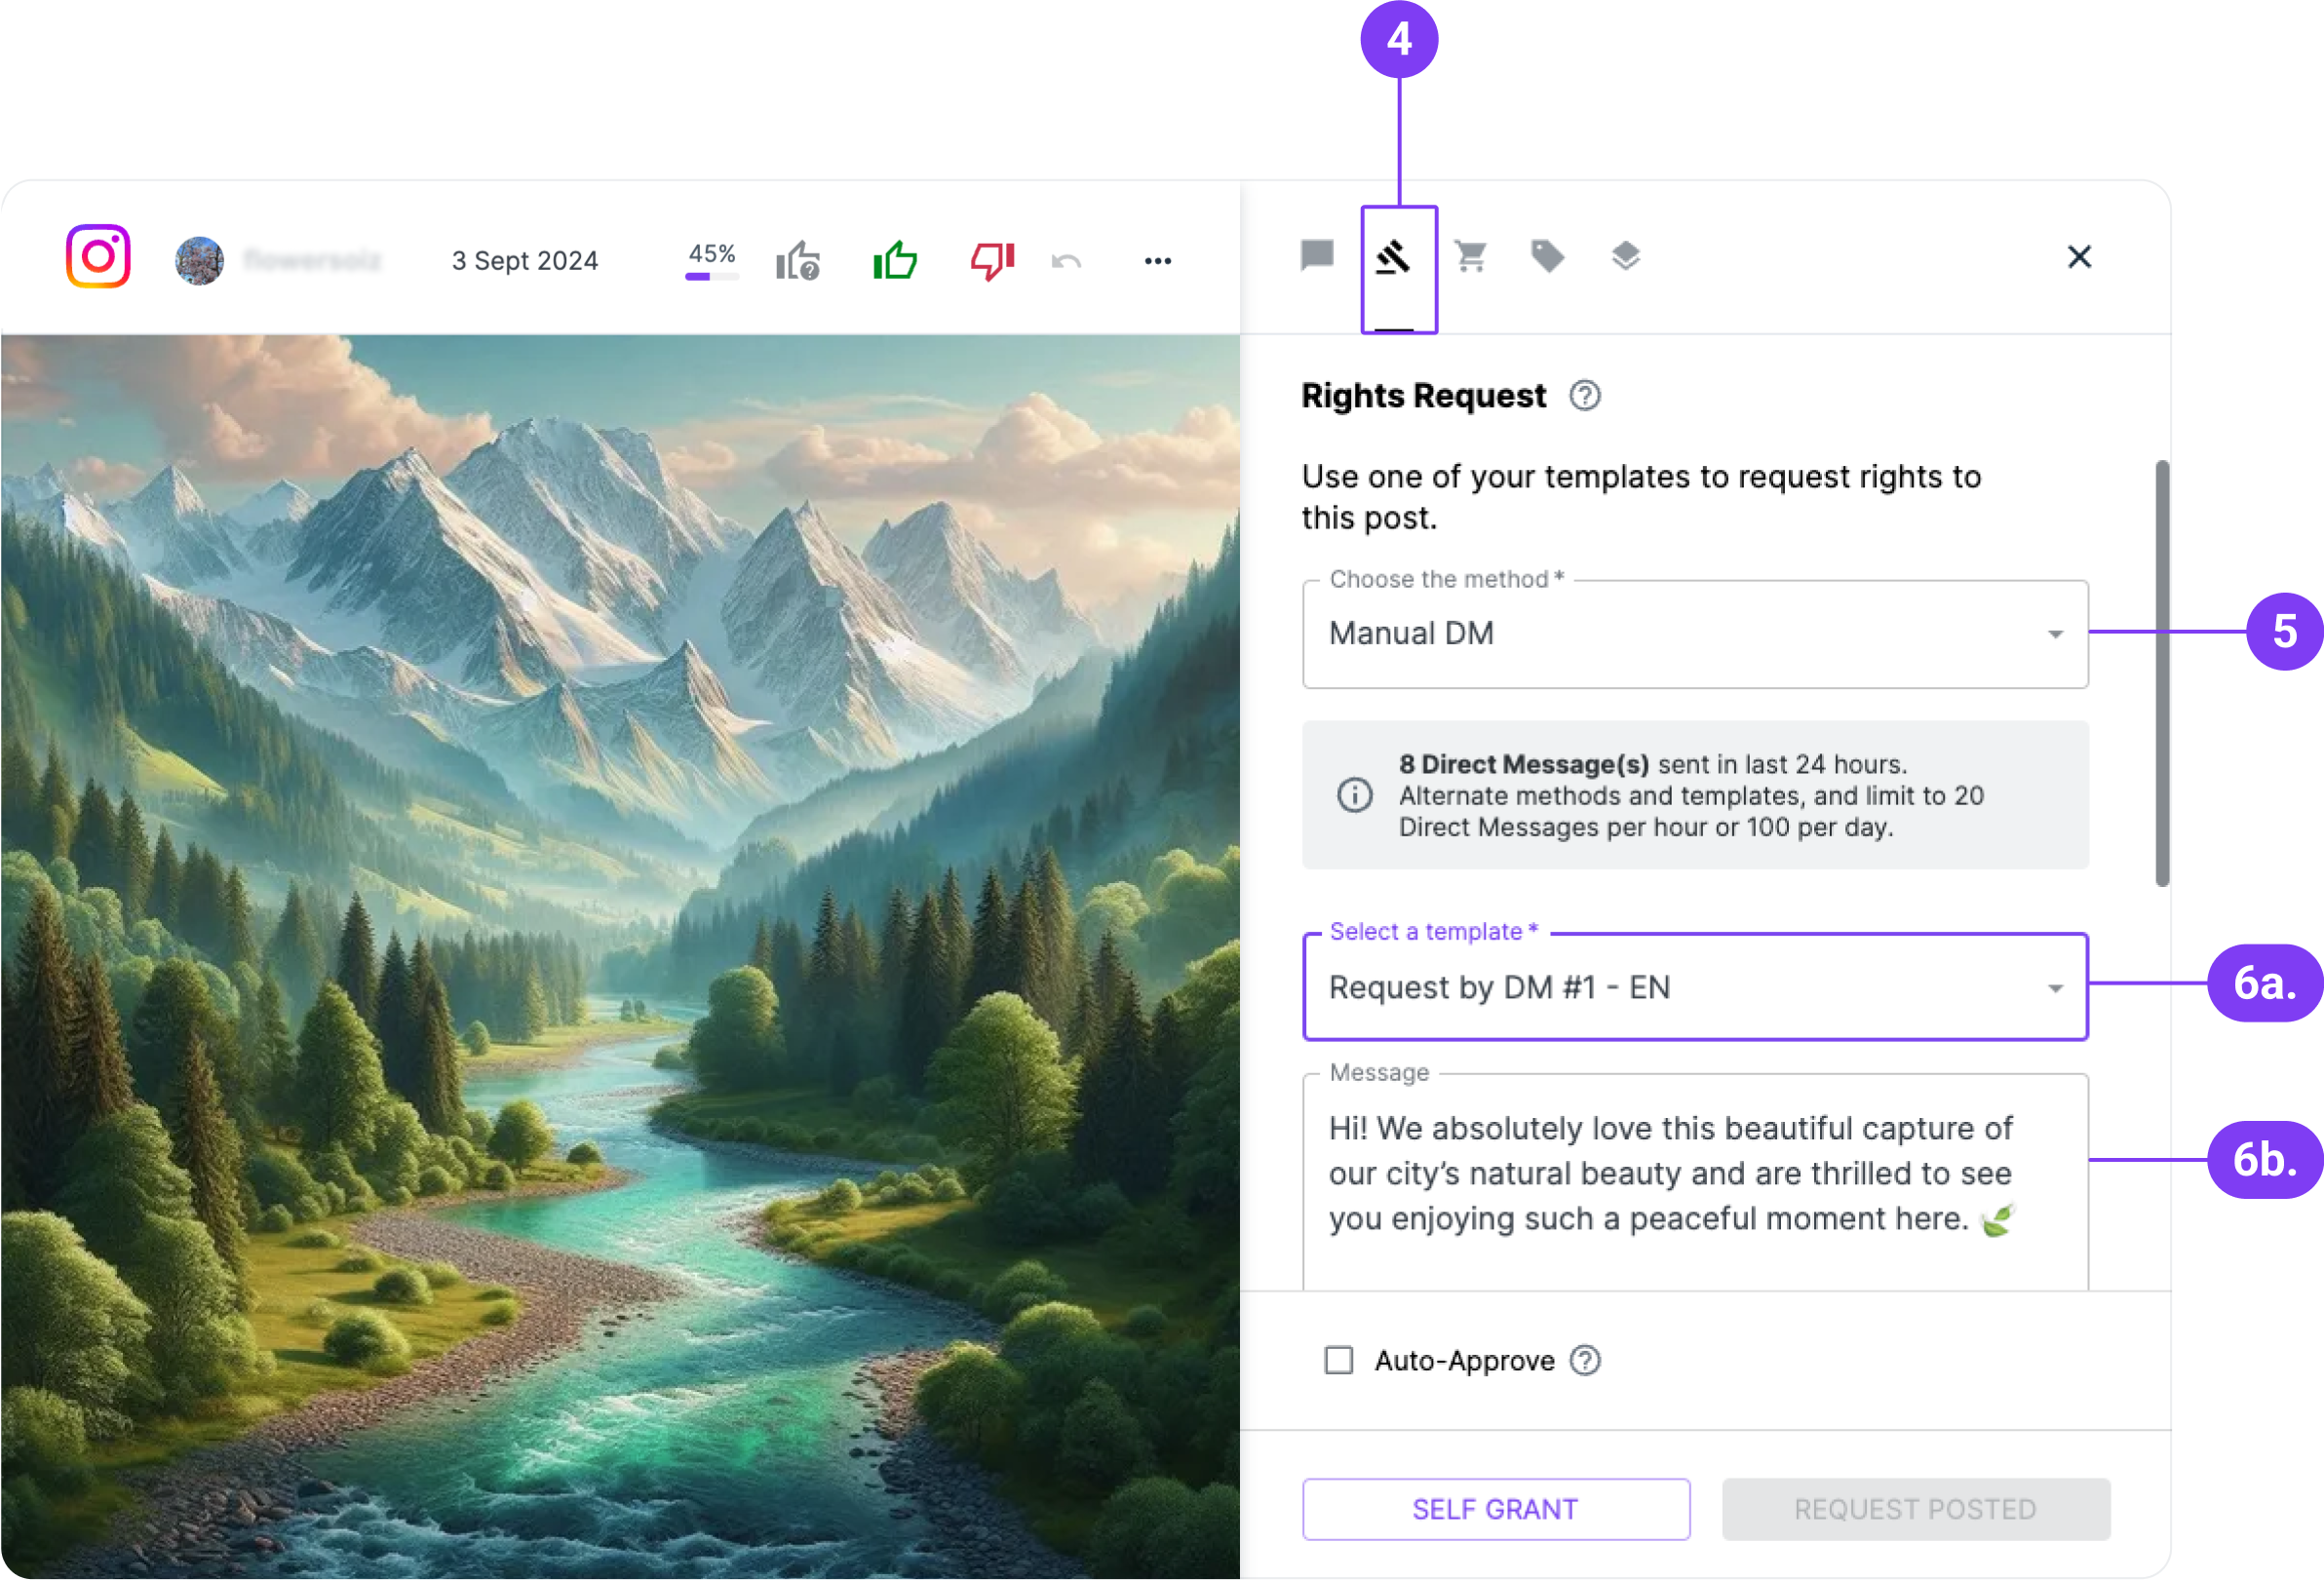
The “Used Time” indication helps you monitor how many times you’ve sent this template in the past 24 hours. To comply with Instagram guidelines, we recommend employing different templates and slightly personalising requests for each post.
Resend a request
We understand that a request without a response after 7 days may have been ignored or missed by the creator.
If you’d like to send a follow-up on Expired Instagram posts, you can resend a new request via Comment.
- Click on a post to open the popup box.
- Select the ‘Rights Request’ tab.
- Click on ‘Resend request via Comment’.
- Post your request, like following the Rights Request by Comment steps.
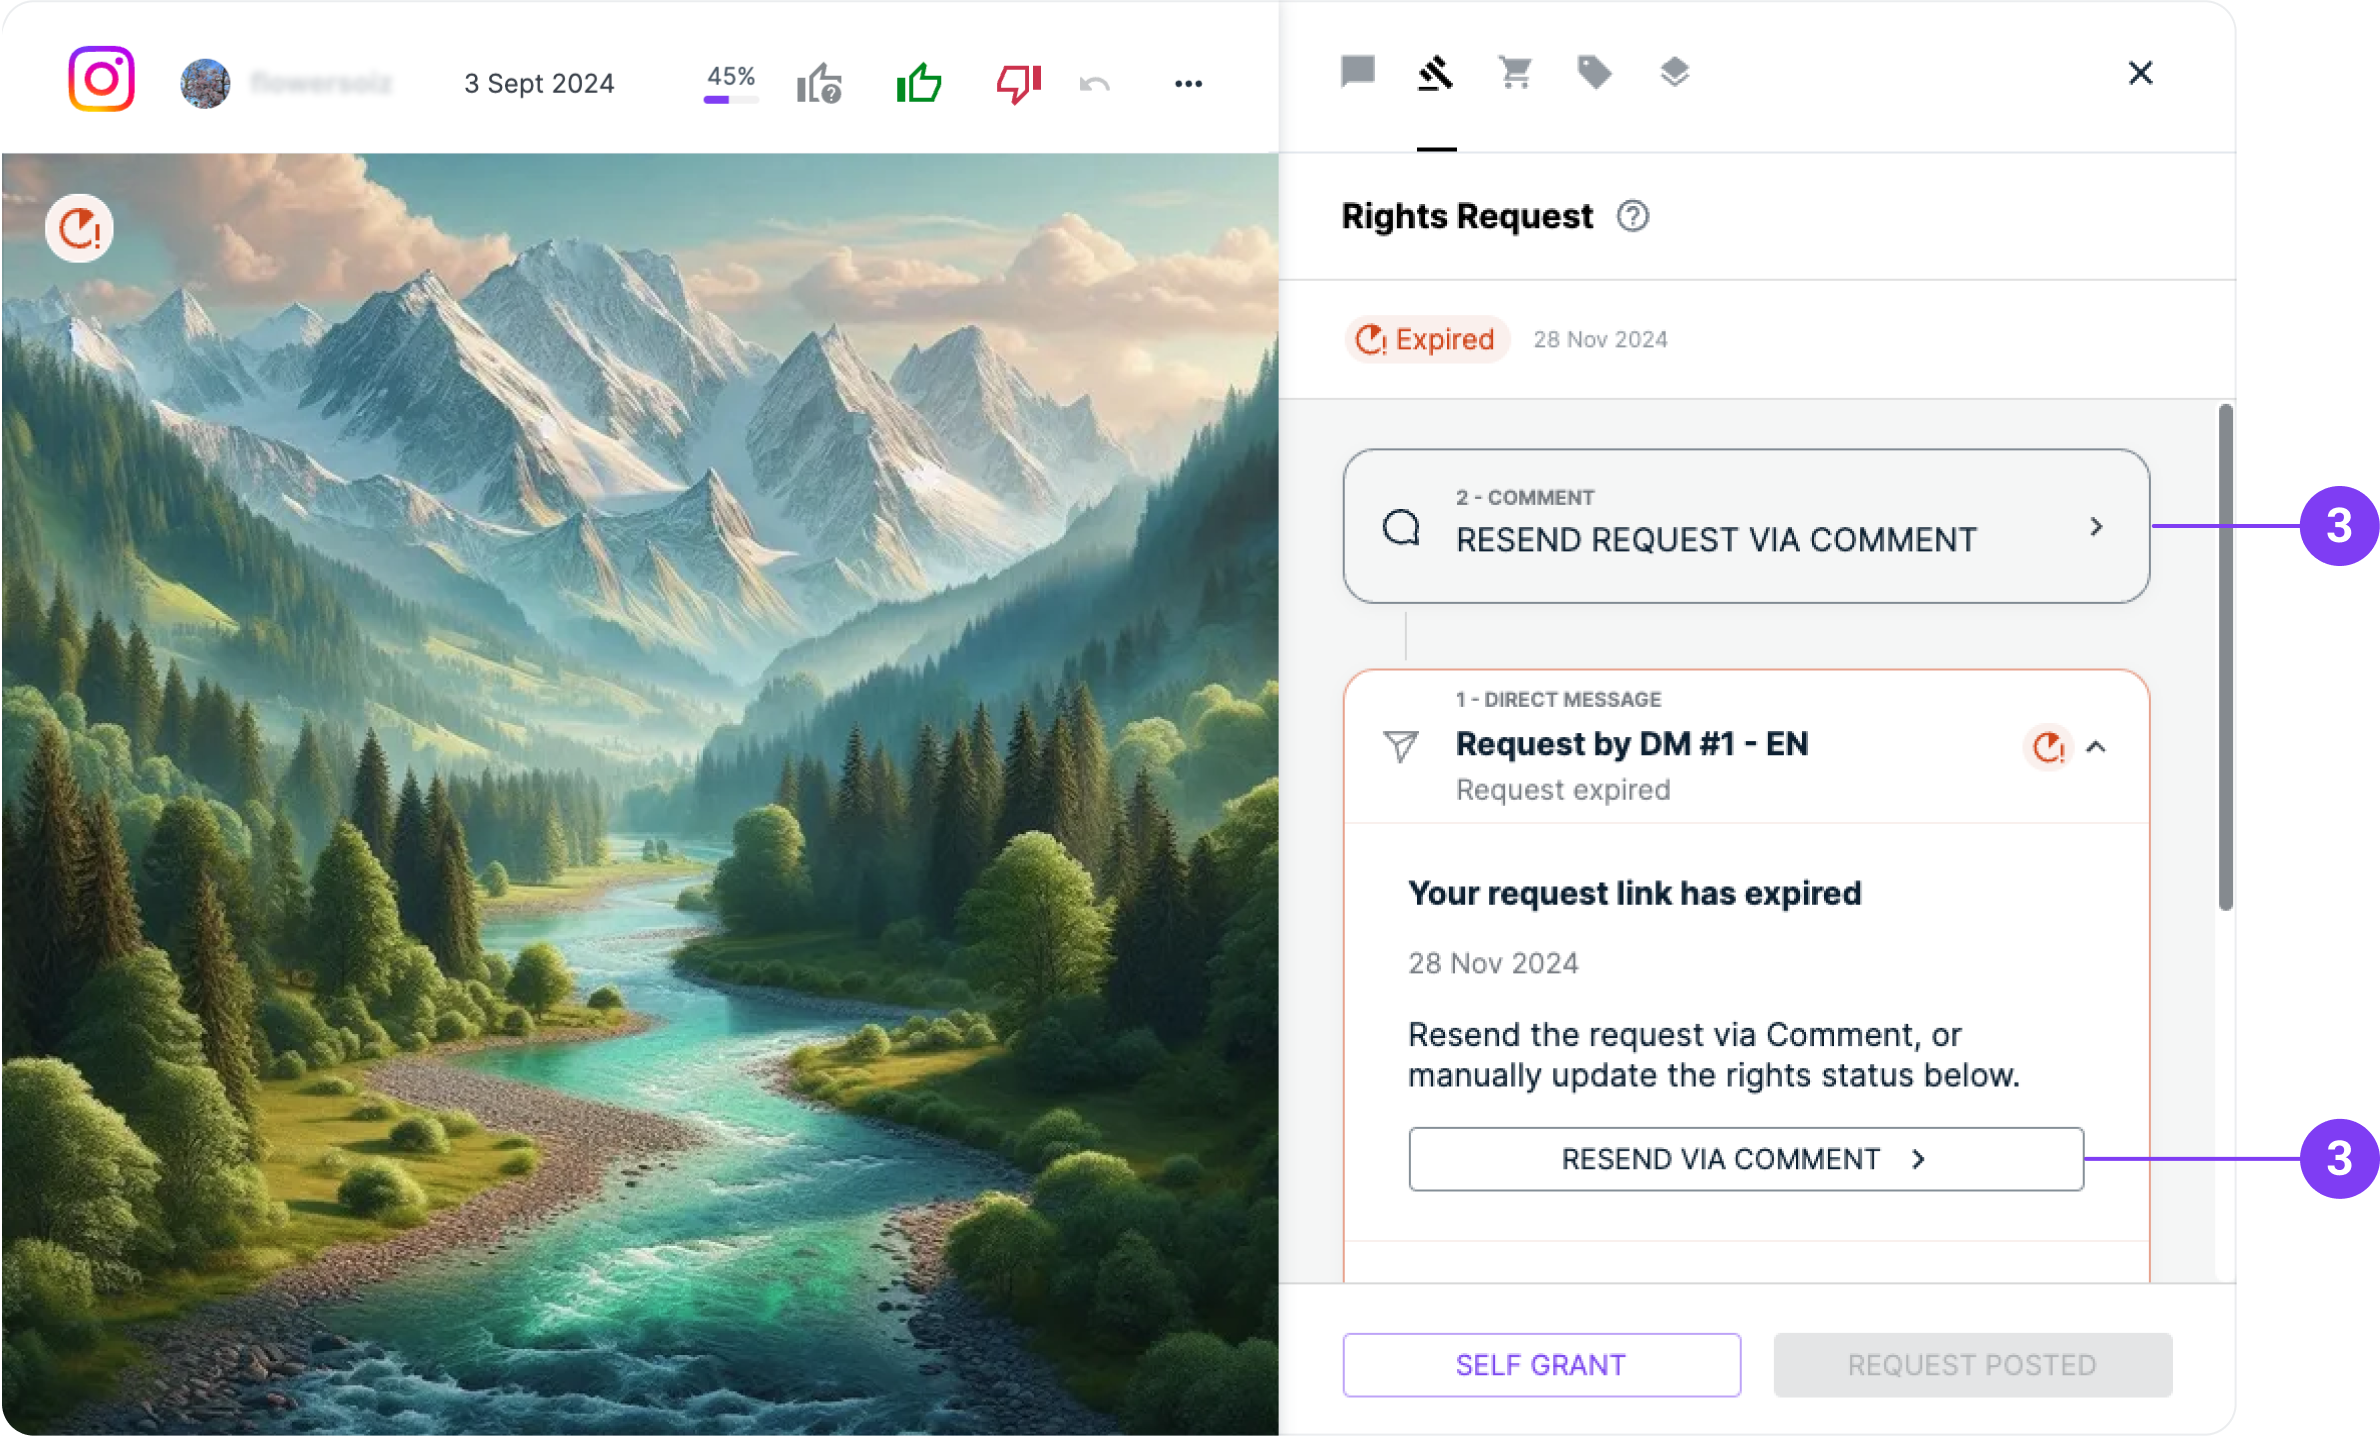
When you post the new request, the history of your original request will remain visible below the new one, and you’ll be able to track the status of the new one.
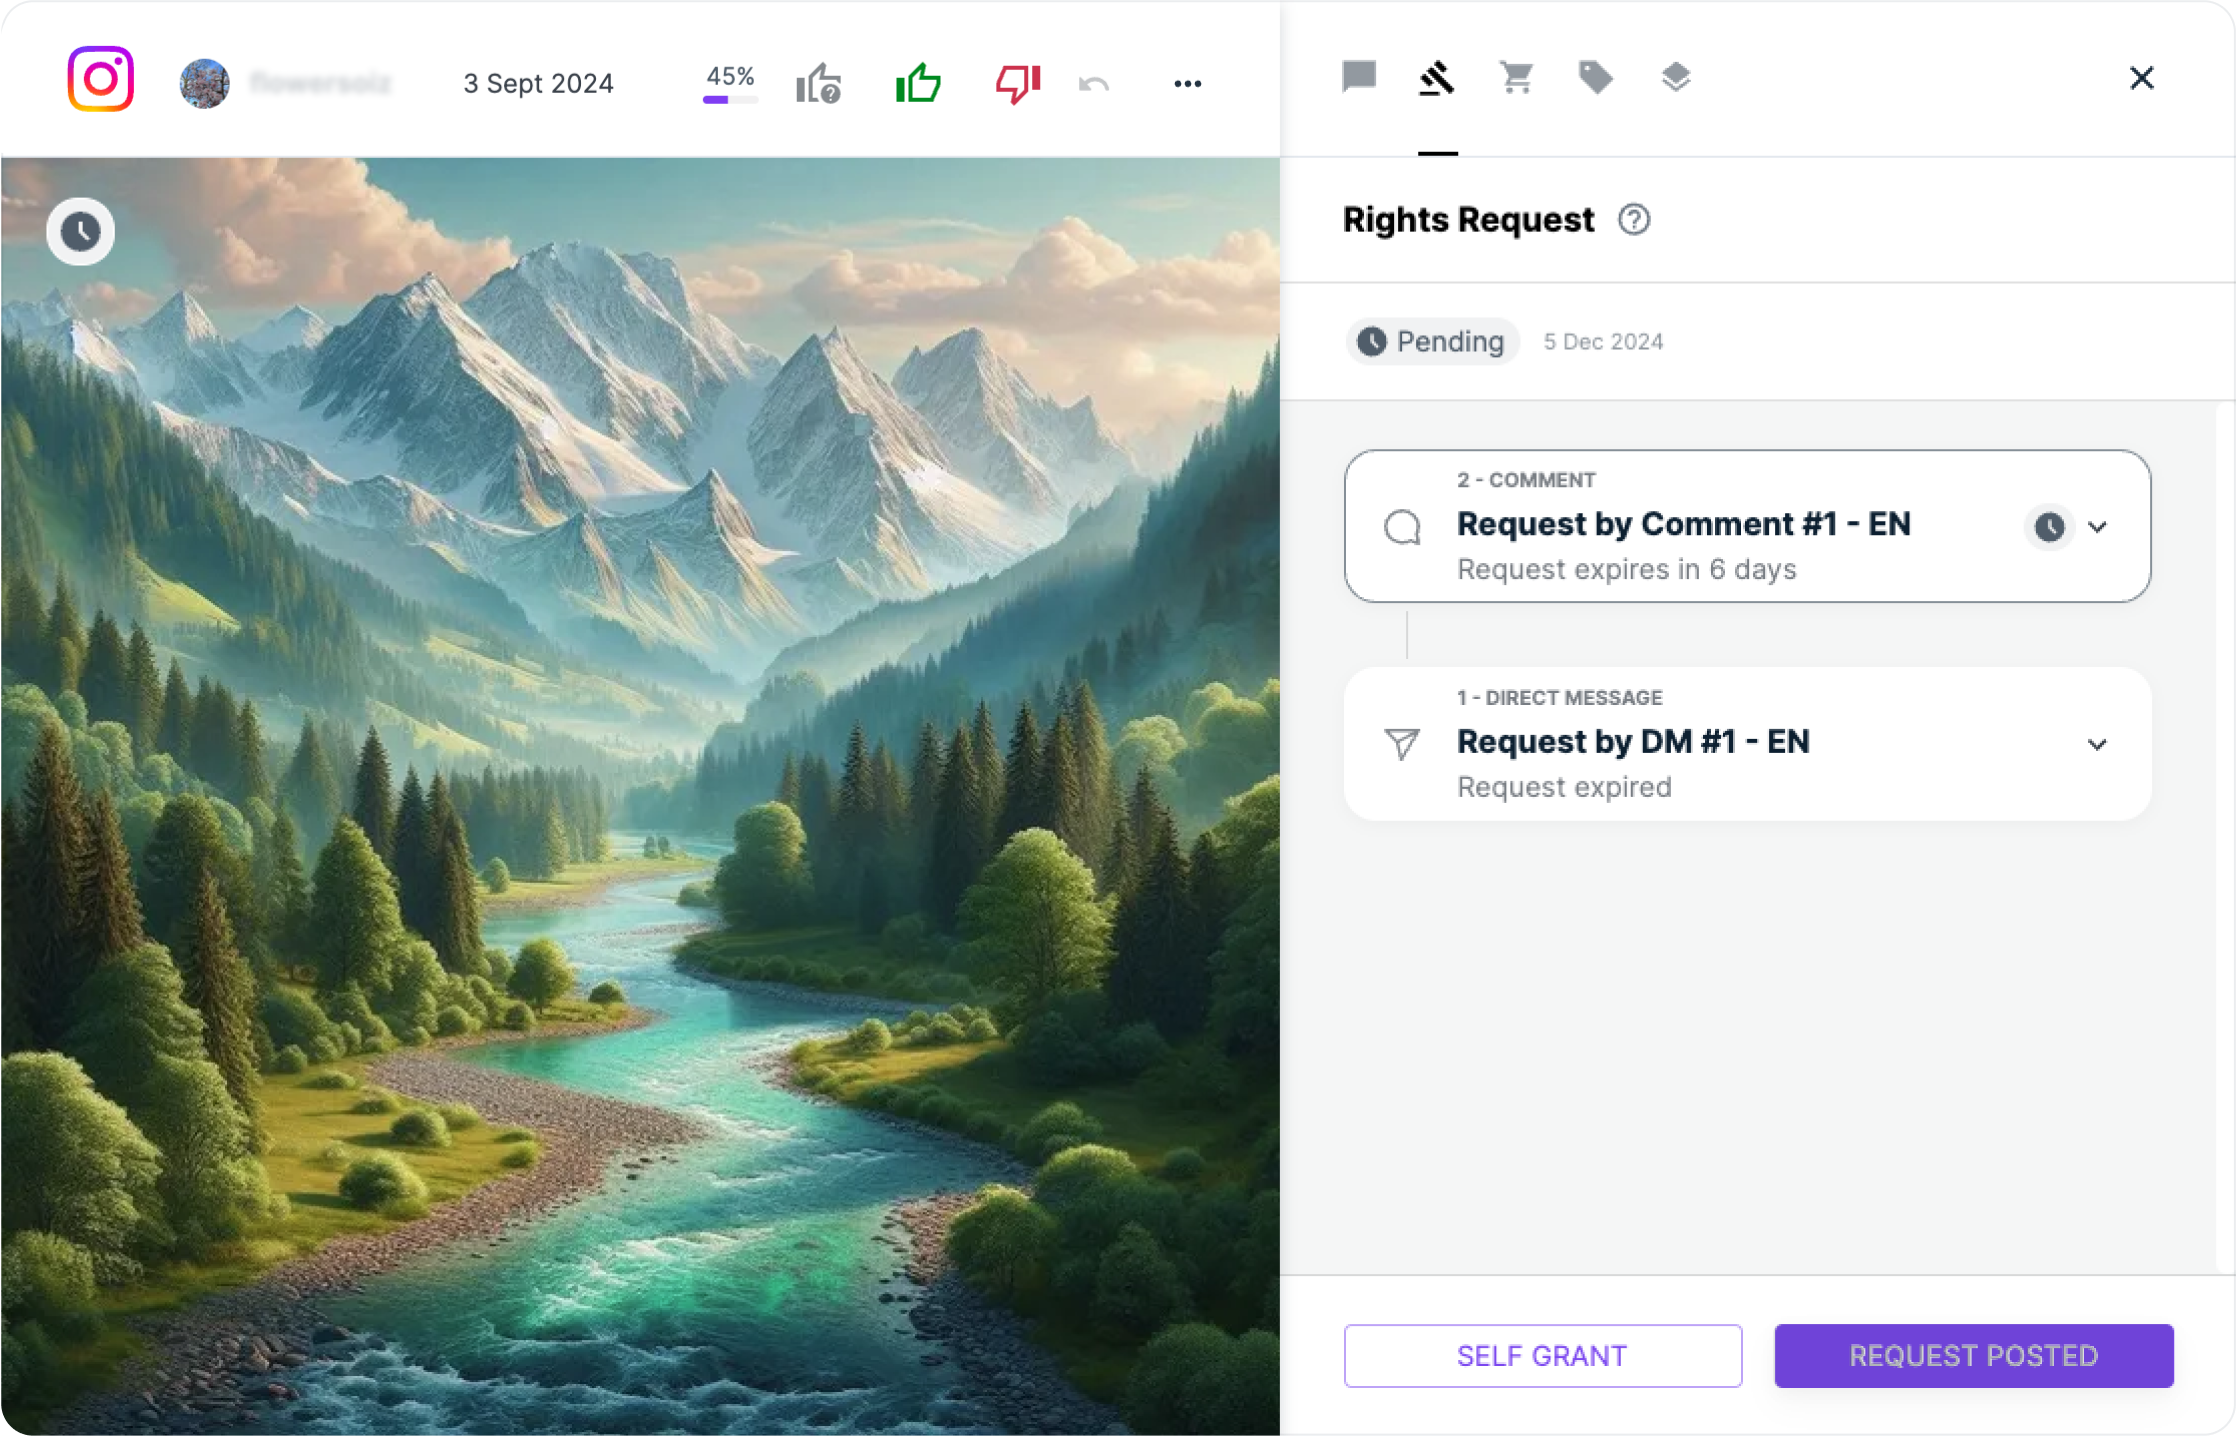
Please note that you can only resend a request once. If the new request also expires without a response, you won’t be able to request rights for that post through Flowbox again.
Self-grant a post
If you have obtained the rights to a post through an external channel other than Flowbox, you can manually mark it as Self-Granted.
This feature can be particularly useful in situations where, for example, you already have an agreement with the creator or they have asked for additional information via DM before granting rights through a message.
- Click on a post to open the popup box.
- Select the ‘Rights Request’ tab.
- Click on ‘Self Grant’.
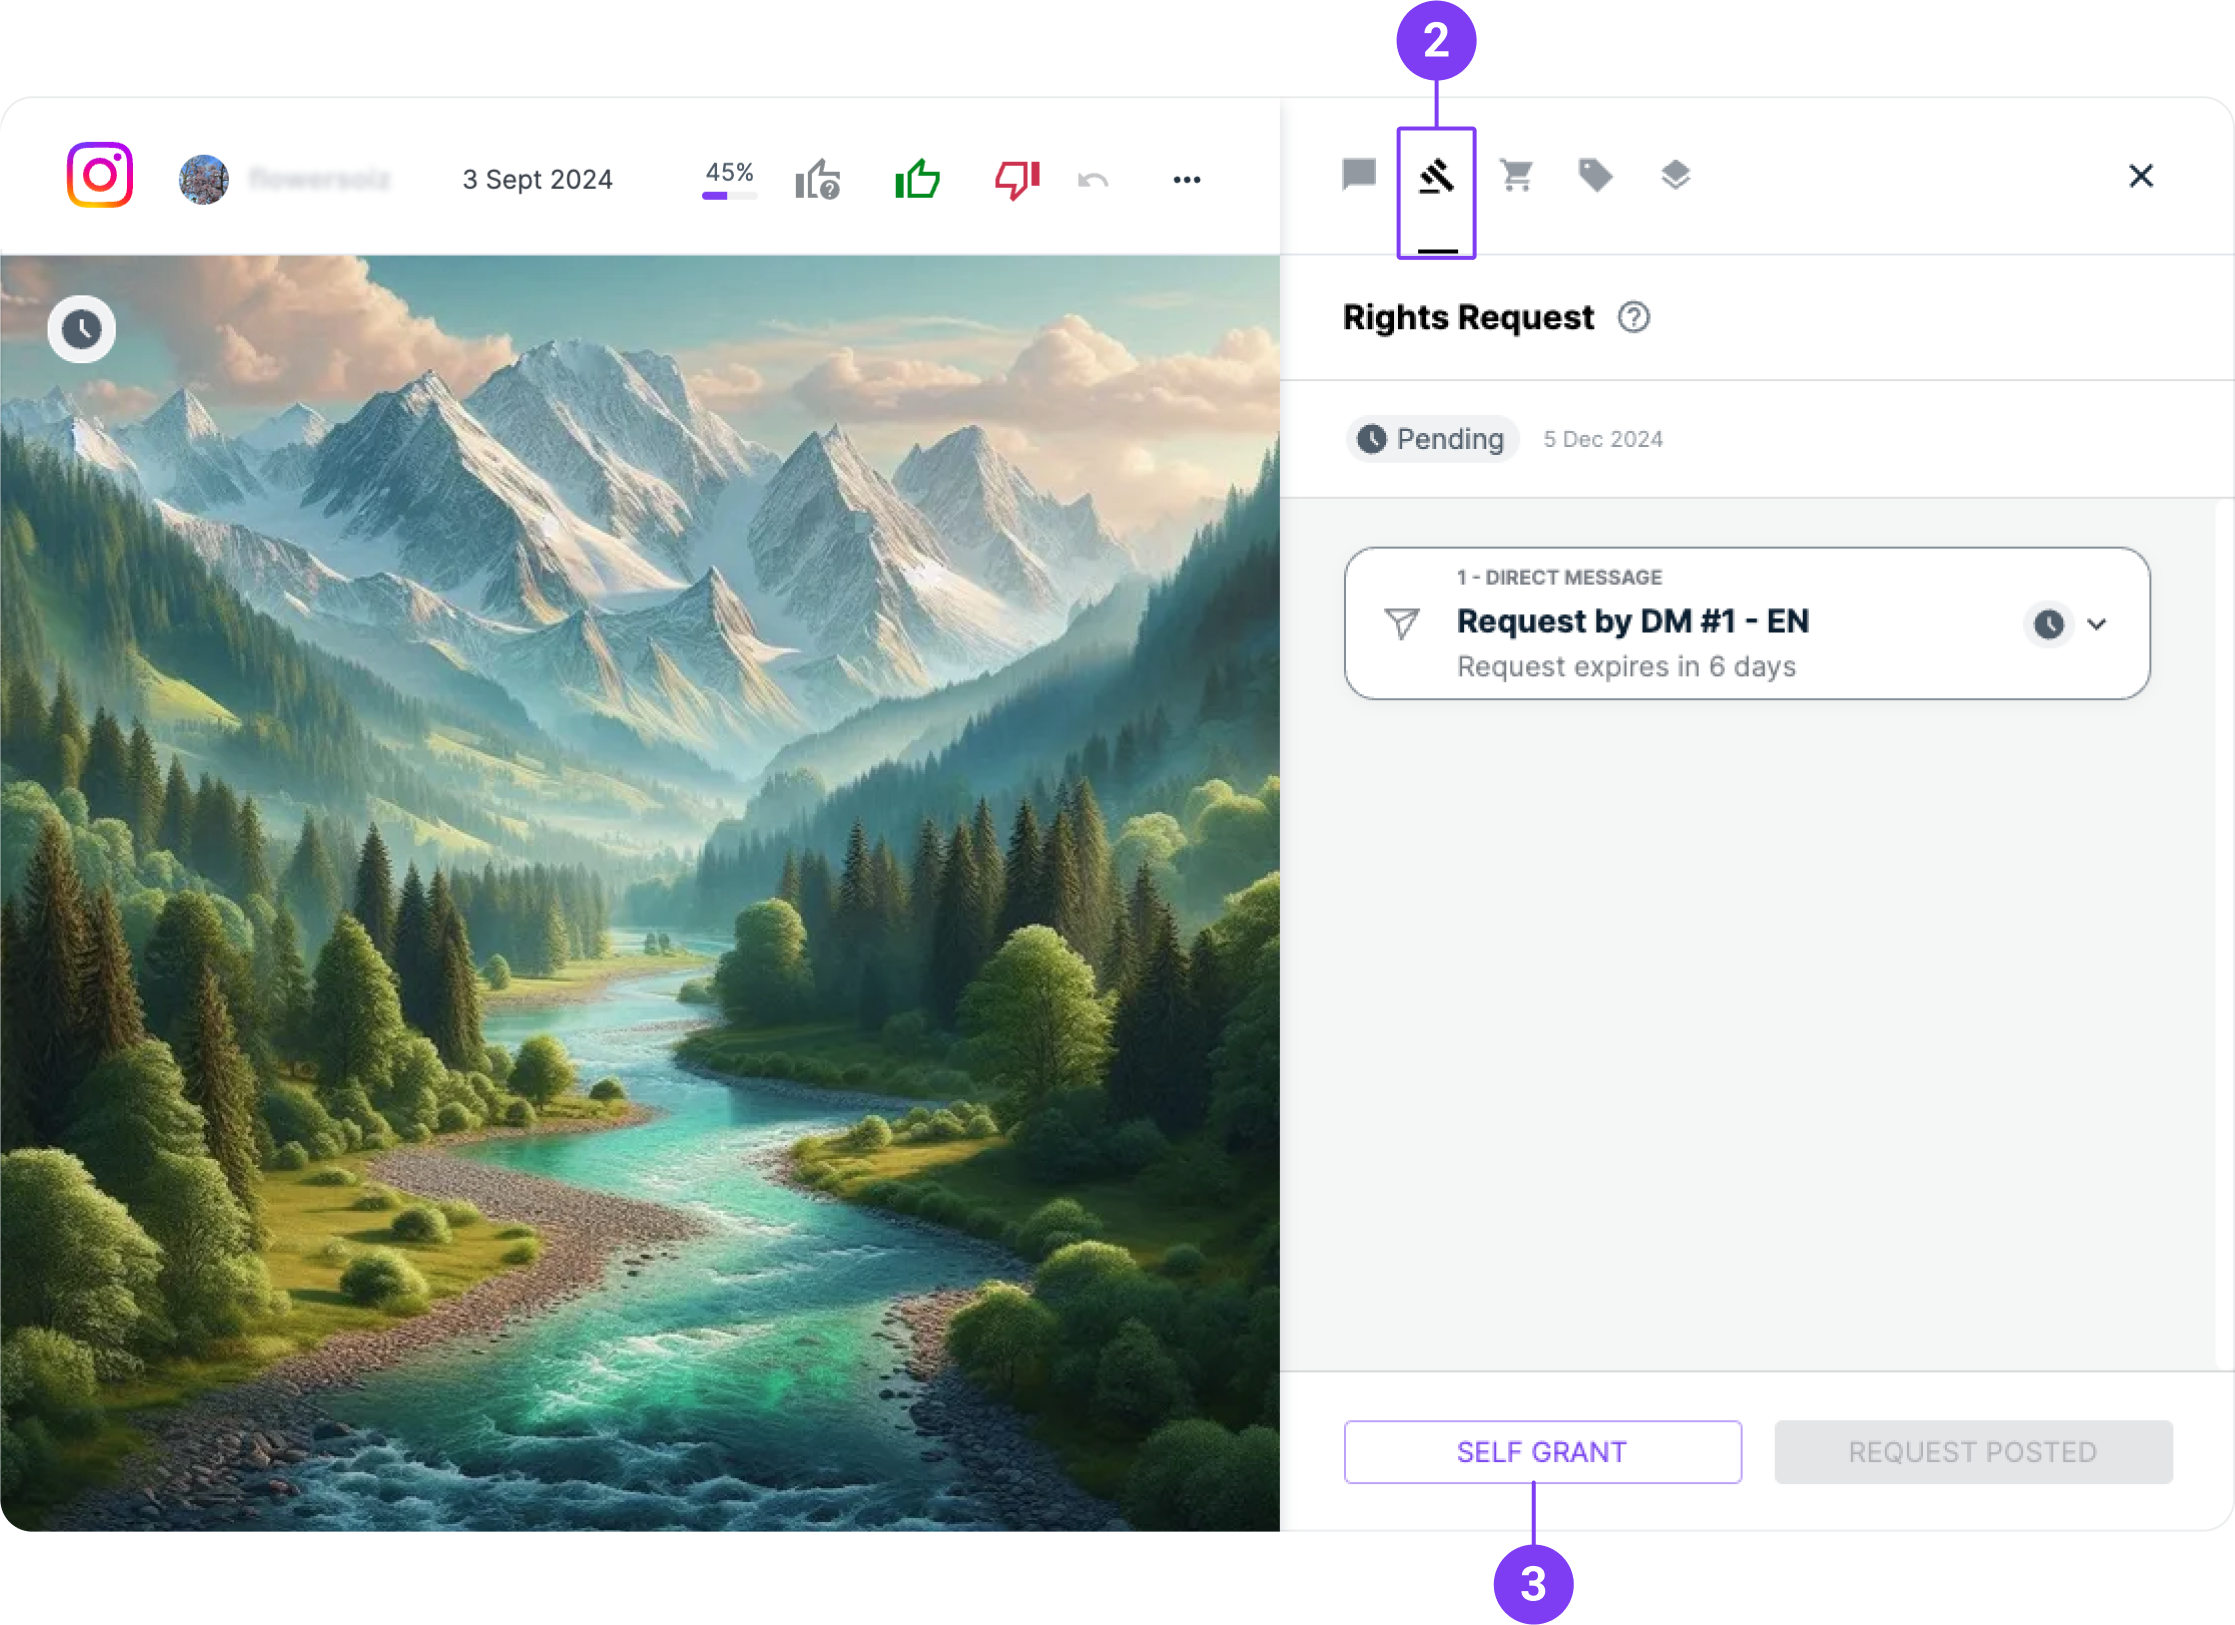
Understanding Rights Request statuses
- Pending: The request has been sent out, awaiting a reply.
- Granted: The user has granted you the rights to use their post by clicking on "Yes, I agree" on the approval page.
- Declined: The user has rejected the request by clicking on "No, I refuse" on the approval page.
- Expired: Your request didn't receive any answer after 7 days.
- Self-granted: You have confirmed that you hold the rights to the post.
For example, if the user has granted rights through a Direct Message and you manually mark the post as 'Self-granted'.
Learn about other statuses.
Please note that posts in Flowbox are always displayed in order of 'most recent' unless you have enabled our AI algorithm Flowscore to automatically sort content based on engagement.
As an example - you see 2 posts in your inbox, Post A and Post B.
- Post A was originally posted online yesterday.
- Post B was shared online in the last hour.
You send Rights Requests to both posts. Assuming both say #Yes, even if Post A replies after Post B, Post B will always show up first in your Flow(s).